Amanda Ivey Grilling Class

Amanda Ivey (Farmers Pantry) Grilling Class – 7/09/26

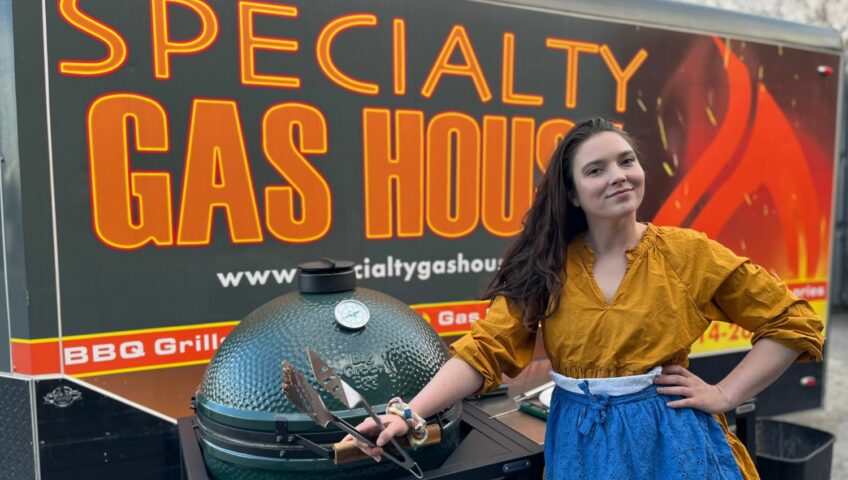
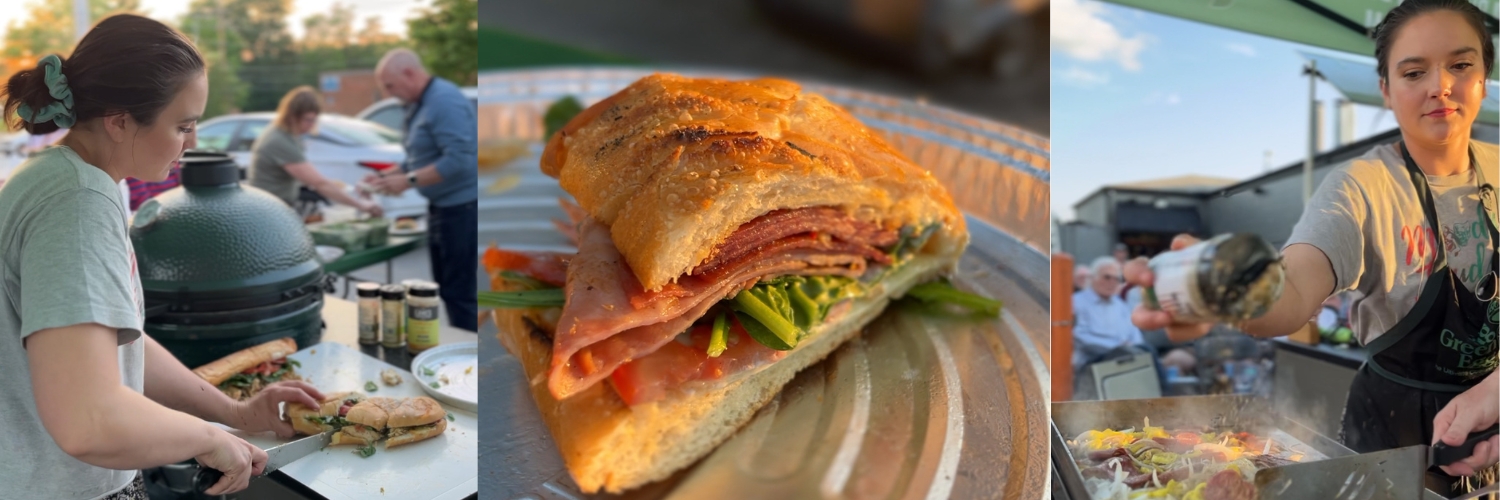
Amanda Ivey, owner of The Farmer’s Pantry, brought an incredible spread to Specialty Gas House for her Road to The Ohio Eggfest Grilling Class, showing just how versatile the Big Green Egg can be! Guests enjoyed bacon-wrapped watermelon rinds, grilled peach salad with burrata, Cajun pork loin, turkey with Alabama white sauce, chocolate cake and frozen sangria while Amanda shared her tips, techniques and recipes for recreating everything at home. A huge thank you to Amanda for an awesome night of great food, grilling and giving back!
amanda ivey farmers pantry grilling class

Grilling Class Recipes


Bacon wrapped watermelon rinds

Ingredients

  • Pickled watermelon rinds
  • Bacon
  • Your favorite spicy rub/seasoning

Directions

  1. Wrap small piece of bacon around watermelon rind and secure with toothpick. Dust with rub.
  2. Grill indirect at 375-400° for about 12 min or until bacon reaches desired consistency.

Grilled Peach Salad

Ingredients

  • Fresh peaches
  • Blueberries
  • Blackberries
  • Pecans
  • Burrata cheese
  • Mixed salad greens
  • Balsamic dressing

Directions

  1. Sauté pecans in butter and brown sugar until fragrant.
  2. Spread out on parchment paper to cool.
  3. Sprinkle with sea salt.
  4. Grill peaches indirectly on grate at 400° Grill until marked. This may be done a day ahead and refrigerated.
  5. Assemble salad when ready and add your favorite balsamic dressing.

Pork loin

Ingredients

  •  pork loin (half or whole)
  • Binder (I used Dijon mustard)
  • Cajun seasoning

Directions

  1. Rub binder all over loin.
  2. Coat with Cajun seasoning and rub in.
  3. Grill indirect at 300° flipping at the 1 hour mark for whole loin.
  4. Cook for another hour until temp reaches 140°
  5. Pull off grill, wrap in foil or covered pan, and let rest for 30 min. Slice and serve.


Turkey with White Alabama Sauce

Ingredients

  • Whole turkey breast
  • Dr BBQ white sauce 2x (1 for and marinade and one for dipping) *see below for recipe

Directions

  1. Marinate turkey breast in white sauce for 8-24 hours in a gallon ziplock or food saver bag
    Discard bag with marinade.
  2. Grill indirect at 300° until temp reaches 160°
  3. Wrap and let rest. Then slice and serve with white sauce.


Dr. BBQ’s White BBQ Sauce
featured in the Dr. BBQ Big Time Barbecue Cookbook

Ingredients

  • Mayonnaise: 1 cup
  • white vinegar: 3/4 cup
  • horseradish: 1 tablespoon
  • Lemon juice: 1 tablespoon
  • black pepper: 1 tablespoon
  • Salt:1 teaspoon
  • Sugar:1 teaspoon

Directions

  1. Combine the mayonnaise, white vinegar, prepared horseradish, lemon juice, black pepper, salt, and sugar into a bowl. Whisk thoroughly until smooth.
  2. Refrigerate for at least 45 to 90 minutes before serving so the flavors can fully meld together.
  3. Marinate turkey (or chicken) in it. Make a separate batch to serve alongside
I add the following ingredients:
•Worcestershire sauce 1 teaspoon
•Dijon mustard 1 teaspoon
•Cayenne pepper 1/8 teaspoon or dash

Chocolate Cake

Ingredients

  • 1 box brownie mix
  • 1 box chocolate cake mix
  • 1 cup oil
  • 1 and 1/4 cup liquid (water, milk, coffee, etc)
  • 4 eggs

Directions

  1. Mix wet ingredients together in a bowl, add both boxes of dry mixes. Don’t over mix.
  2. Pour into greased Bundt pan.
  3. Cook indirect at 350° for 50 min
  4. Let cool then invert onto a platter.
  5. Frost with warmed frosting or marshmallow crème.


Sangria

Ingredients

  • 1 gallon sangria wine
  • 1 container frozen limeade
  • 1 bottle club soda or lemon-lime soda
  • Sliced fruit
  • 4 ziplock bags (gallon size)

Directions

  1. Double bag 2 bags pour half of the wine into each bag.
  2. Split limeade between bags, Freeze  until slush consistency.
  3. Pour frozen bags into your dispenser, pitcher, or bowl.
  4. Add soda and cut fruit.
  5. Stir and serve


Comments/Questions

We’d love to hear from you! Give us a comment on what you thought or if you have any questions. Check our grilling class calendar to join us at our next one! 
Grilling Classes


damian buck grilling class recipe food

Damian Buck Grilling Class

Damian Buck Grilling Class – 6/18/26

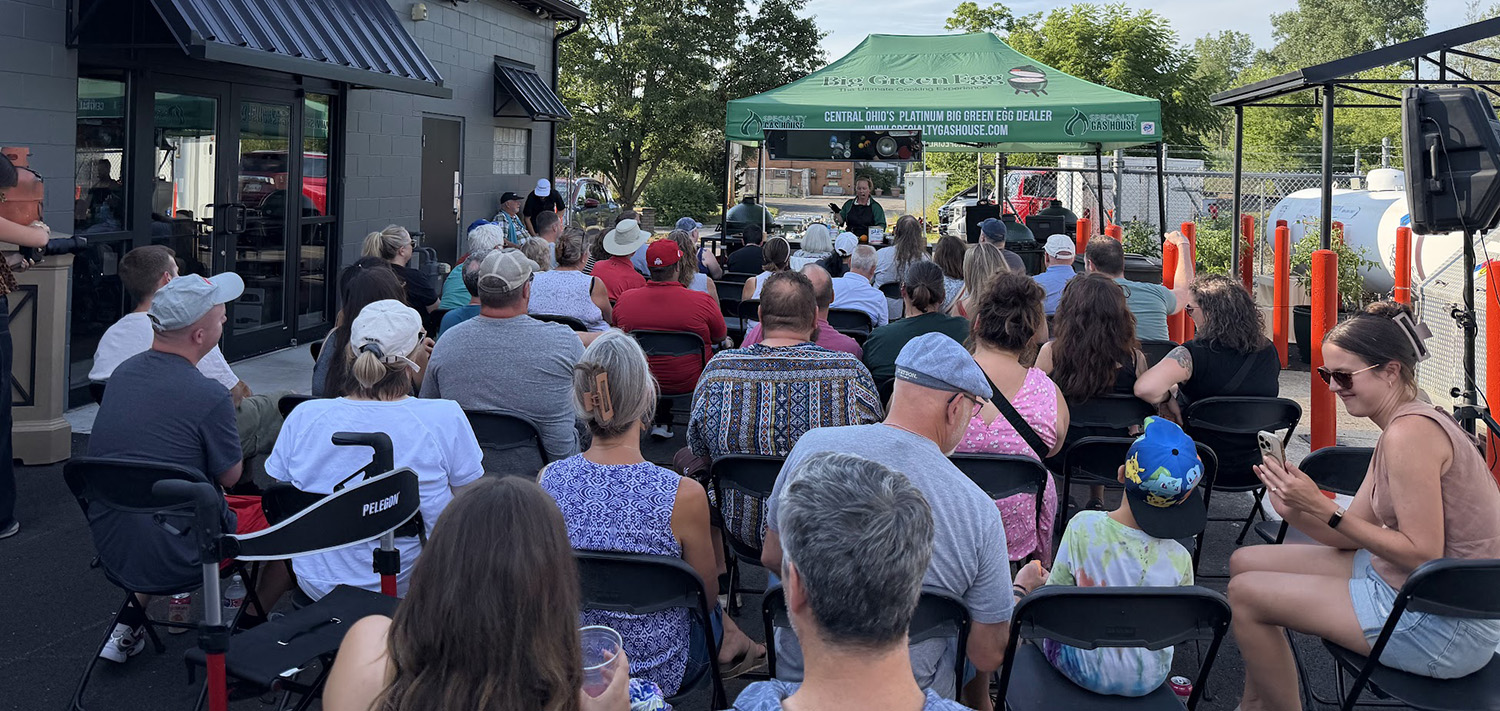
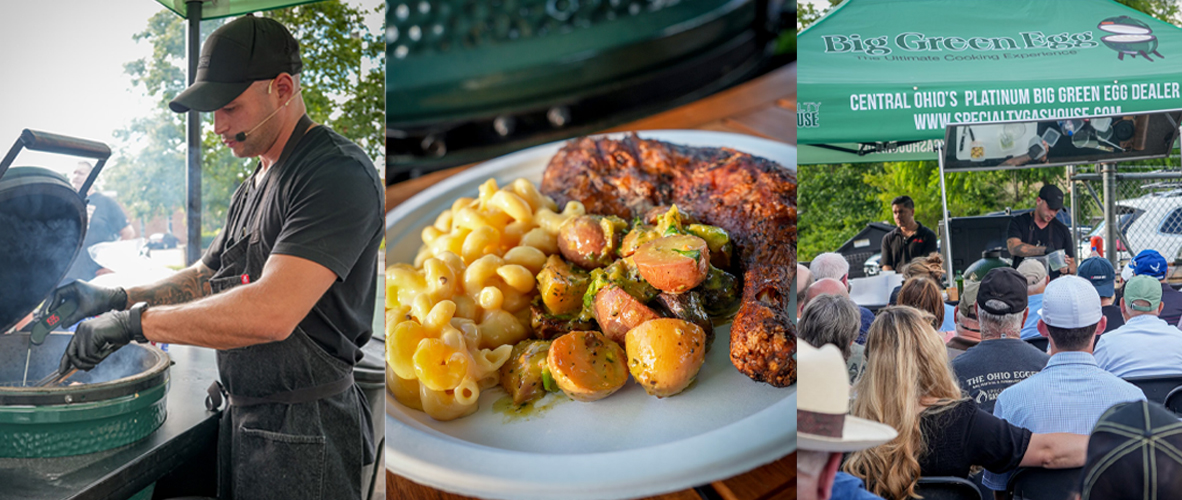
Damian Buck joined us at Specialty Gas House for another great evening of live-fire cooking, Big Green Egg techniques, and incredible food. A 24-time BBQ Champion and three-time Ohio Eggfest Champion, Damian shared some of his favorite recipes while showing guests how to get the most out of their Big Green Eggs.

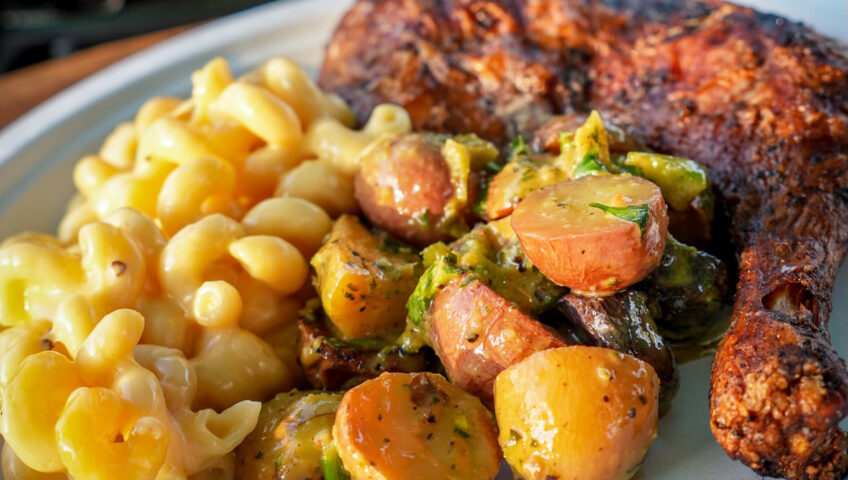
The menu featured his Dad’s updated, Dewey’s Big Green Egg Chicken, Herbed Potato Salad, and a crowd-favorite Smoked Mac & Cheese.  A huge thank you to Damian for donating his time and talent to help support cancer research through Buckeye Cruise for Cancer and The James Cancer Hospital. If you’re looking for delicious, chef-prepared meals ready to enjoy at home, be sure to check out Ember Kitchen Co., Damian’s meal prep service, serving Central Ohio with fresh, high-quality meals made from scratch.

damian buck grilling cooking class at specialty gas house in columbus ohio

Photos by Terica Whitsel

Grilling Class Recipes

Here are the recipes from our recent grilling class. This menu brought together Chicken Quarters, Smoked Mac & Cheese and Smoked Herb Potato Salad.


Dewey’s Big Green Egg Chicken

Ingredients

  • 2 cups white distilled vinegar
  • 1 cup vegetable oil
  • 1 egg
  • 2 tbsp kosher salt
  • 1 tbsp smoked salt
  • 1 tbsp poultry seasoning
  • 1 tbsp coarse black pepper

Directions

  1. In a blender, combine vinegar, oil, egg, kosher salt, smoked salt, poultry seasoning, and black pepper. Blend until smooth.
  2. Refrigerate the marinade overnight to allow the flavors to come together.
  3. Place chicken in a large container or zip-top bag and pour marinade over the chicken.
  4. Marinate in the refrigerator for 2–4 hours.
  5. Remove chicken from the marinade and allow excess marinade to drain off. Pat the skin dry with paper towels.
  6. Preheat Big Green Egg to 400°F indirect.
  7. Place chicken skin-side up on the grill and cook until the internal temperature reaches approximately 170°F in the thickest part of the thigh.
  8. Avoid spraying or basting during the first half of the cook. If desired, lightly baste once during the second half using reserved marinade that has not touched raw chicken.
  9. When the chicken reaches 170°F, remove the convEGGtor and increase the temperature to 500–550°F.
  10. Grill skin-side down directly over the coals for 1–3 minutes, watching carefully for flare-ups, until the skin is crisp and golden.
  11. Continue cooking until the thighs reach 185–190°F internal temperature.
  12. Rest 10 minutes before serving. Can do final spritz.

Herbed Potato Salad

Ingredients

  • 2 lb small potatoes, halved
  • 1 tbsp Lanes Brisket Seasoning

Herb Dressing:

  • ¼ cup olive oil
  • ⅓ cup fresh flat-leaf parsley, roughly chopped
  • ⅓ cup green onions, roughly chopped
  • 2 tbsp fresh lemon juice
  • 2 tsp Dijon mustard
  • 2 cloves garlic, roughly chopped
  • 1 Tbsp Lanes Brisket Seasoning

Finish:

  • 3 stalks celery, diced
  • 2 tbsp parsley, chopped
  • 2 tbsp green onions, thinly sliced
  • Kosher salt, to taste
  • Freshly ground black pepper, to taste

Directions

  1. Set your Big Green Egg for indirect cooking at 350°F.
  2. Halve the baby potatoes. Place in a bowl and lightly toss with olive oil and Lawry’s Black Pepper Seasoned Salt.
  3. Transfer the potatoes to a cast-iron pan or hotel pan and place on the grill.
  4. Cook until probe tender, about 50–70 minutes depending on size, stirring occasionally for even cooking.
  5. While the potatoes cook, combine the olive oil, parsley, green onions, lemon juice, Dijon mustard, garlic, black pepper, and ¼ cup water or chicken stock in a blender. Blend until smooth.
  6. Transfer the hot potatoes to a large mixing bowl and toss with the dressing while still warm.
  7. Let rest for 10–15 minutes.
  8. Fold in the celery, chopped parsley, and sliced green onions.
  9. Taste and adjust with additional Lawry’s Black Pepper Seasoned Salt if needed.
  10. Serve warm, room temperature, or chilled.

Mac & Cheese

Ingredients

  • 1 lb Barilla Cellentani pasta
  • 10 oz white American cheese, shredded
  • 10 oz Tillamook Sharp Cheddar, shredded 

Custard:

  • 2 eggs
  • 1½ cups heavy cream
  • ½ cup milk
  • 4 tbsp unsalted butter, melted
  • 1½ tsp fine kosher salt
  • ½ tsp coarse black pepper
  • ½ tsp mustard powder


Directions

  1. Preheat the Big Green Egg for indirect cooking at 350°F.
  2. Bring a large pot of salted water to a boil. Cook the cellentani until very al dente, about 2–3 minutes less than package directions. Drain.
  3. In a large bowl, whisk together the eggs, heavy cream, milk, kosher salt, black pepper, and mustard powder.
  4. Add the warm pasta, white American cheese, and Tillamook Sharp Cheddar. Mix until evenly combined. Transfer the mixture to a disposable aluminum pan.
  5. Evenly distribute the butter over the top of the macaroni and cheese. Cover tightly with aluminum foil.
  6. Place the pan inside a larger pan filled with hot water to create a water bath.
  7. Transfer to the Big Green Egg and cook at 350°F for 45–60 minutes, or until the custard is set and the cheese is fully melted.
  8. Remove from the grill and let rest for 10 minutes before serving.


Comments/Questions

We’d love to hear from you! Give us a comment on what you thought or if you have any questions. Check our grilling class calendar to join us at our next one! 
Grilling Classes


chef dan varga the hungarian butcher grilling cooking class at specialty gas house in columbus ohio

Chef Dan Varga Grilling Class

Chef Dan Varga (The Hungarian Butcher) Grilling Class – 5/14/26

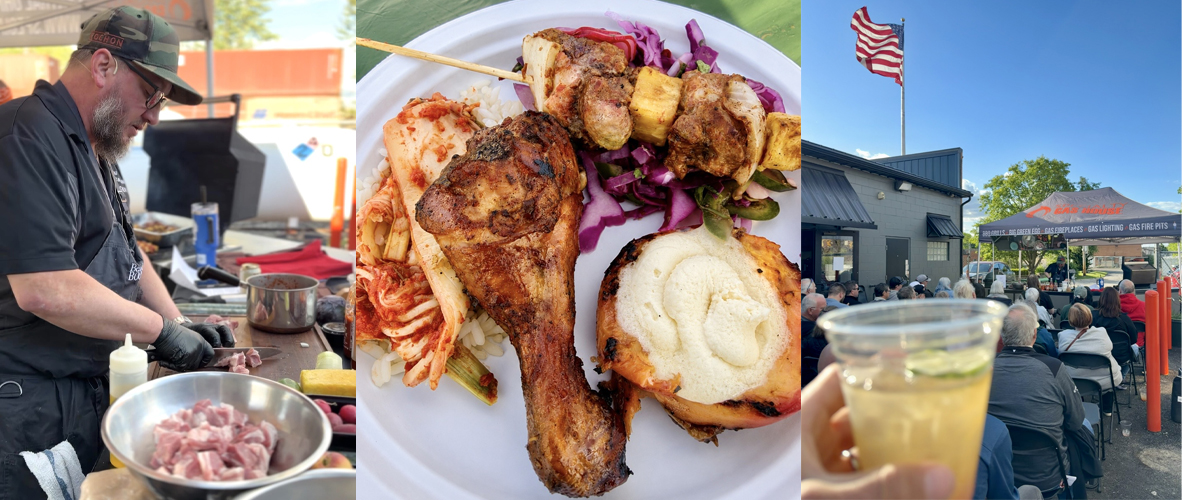
Chef Dan Varga joined us once again at Specialty Gas House for another sold-out grilling class benefiting Honor Flight Columbus, and once again, he absolutely delivered. Chef Dan and Gaby put together an incredible menu packed with bold flavors, live-fire cooking techniques, and creative twists.

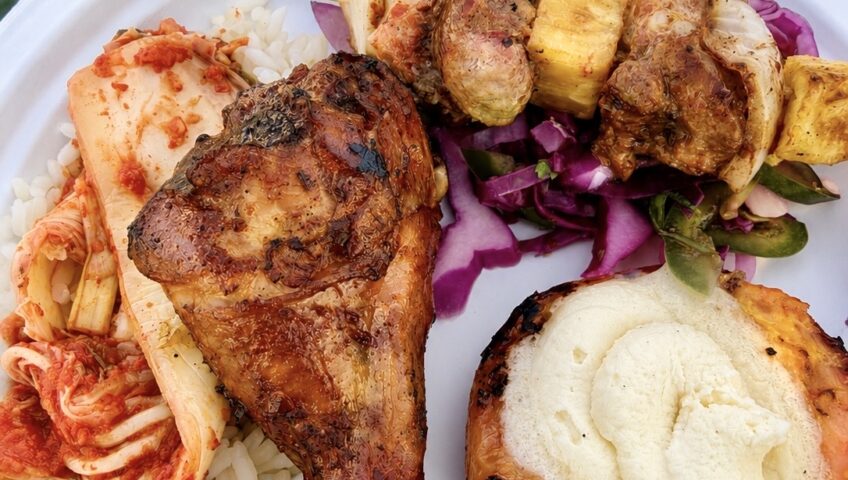
The evening featured Al Pastor Pork Skewers served over a fresh red slaw, Sriracha & Sweet Chili Smoked Chicken with Hei Hei Kimchi and steamed rice, and finished with Grilled Georgia Peaches topped with whipped mascarpone, honey, and thyme. From smoking and caramelizing chicken on the Big Green Egg to perfectly grilled peaches for dessert, the class was full of inspiration, technique, and amazing food.

A huge thank you to Chef Dan for continuing to donate his time and talent to help raise money for Honor Flight Columbus. Be sure to visit Chef Dan, Gaby and his team at The Hungarian Butcher in Worthington for incredible cuts of meat, house-made specialties, and one of the best butcher shop experiences in Central Ohio. Hungarian Butcher – 2177 W Granville Rd, Columbus, OH 43085

chef dan varga the hungarian butcher grilling cooking class at specialty gas house in columbus ohio

Grilling Class Recipes

Here are the recipes from our recent grilling class. This menu brought together smoky, sweet, spicy, and fresh flavors with al pastor pork skewers, smoked chicken with kimchi, and grilled peaches with whipped mascarpone.


Al Pastor Skewers

Ingredients

Skewers

  • 1.5 lb diced pork neck/collar, also known as coppa
  • ½ pineapple, cut into 1-inch cubes
  • 1 medium onion, cut into 1-inch cubes

Marinade

  • 3 oz dried guajillo chiles, soaked in very hot water for 30 minutes
  • ½ onion
  • 8 oz diced pineapple
  • ½ cup apple cider vinegar
  • 1 tbsp dried oregano
  • 1 tbsp cumin
  • 1 tbsp salt

Directions

  1. Add all marinade ingredients to a blender or food processor and blend until smooth.
  2. Toss diced pork with the marinade until fully coated.
  3. Refrigerate for several hours or overnight.
  4. Build skewers by alternating pork, pineapple, and onion.
  5. Grill over charcoal until the pork reaches an internal temperature of 165°F.
  6. Rest for 10 minutes.
  7. Serve over red slaw.

Red Slaw

Ingredients

  • 1 head red cabbage, shredded
  • 2 shallots, julienned
  • 1 bunch radishes, sliced
  • 1 bunch cilantro, chopped
  • 2 jalapeños, diced
  • 2 cucumbers, sliced
  • Dried oregano, to taste
  • 1 cup lime juice
  • Salt, to taste

Directions

  1. Combine all ingredients in a large bowl.
  2. Toss well.
  3. Chill before serving.

Sriracha & Sweet Chili Smoked Chicken with Hei Hei Kimchi

Ingredients

  • 1 cup Sriracha
  • 1 cup Thai sweet chili sauce
  • JJ’s Chipotle Carolina Dry Rub
  • 2 lb chicken parts of choice
  • 1 jar Hei Hei Kimchi
  • 2 cups steamed rice

Directions

  1. Marinate the chicken overnight with Sriracha, Thai sweet chili sauce, and JJ’s Chipotle Carolina Dry Rub.
  2. Set the Big Green Egg to 225°F.
  3. Smoke chicken for 60–90 minutes, or until it reaches an internal temperature of 165°F.
  4. Increase grill temperature to 420°F.
  5. Grill chicken to finish and caramelize the exterior.
  6. Rest for 15 minutes.
  7. Serve with Hei Hei Kimchi and steamed rice.

Grilled Georgia Peaches with Whipped Mascarpone, Honey & Thyme

Ingredients

Peaches

  • 4 peaches, halved and pitted
  • 4 oz brown sugar
  • 1 tbsp olive oil
  • 1 tbsp local honey
  • 3 sprigs thyme

Whipped Mascarpone

  • 8 oz mascarpone
  • 1 oz granulated sugar
  • 1 tbsp vanilla
  • 8 oz heavy whipping cream

Directions

  1. Drizzle peaches with olive oil and sprinkle with brown sugar.
  2. Grill cut side down until slightly tender.
  3. Flip and continue grilling for several more minutes.
  4. Remove from the grill and drizzle with honey and thyme.

Whipped Mascarpone Directions

  1. Combine heavy cream, mascarpone, sugar, and vanilla.
  2. Whip until stiff peaks form.
  3. Chill until ready to serve.

To Serve

  1. Plate the grilled peaches.
  2. Top with whipped mascarpone.
  3. Finish with additional honey and thyme, if desired.

Specialty Gas House Pineapple Ranch Water

A light, refreshing cocktail served during our grilling class that pairs perfectly with Summer cookouts.

Ingredients

  • 2 oz tequila blanco
  • 2 oz pineapple juice
  • ½ oz fresh lime juice
  • ½ oz agave syrup
  • Topo Chico sparkling water
  • Optional splash of grenadine
  • Lime wedge for garnish

Directions

  1. Fill a glass with ice.
  2. Add tequila, pineapple juice, lime juice, and agave syrup.
  3. Top with Topo Chico and gently stir.
  4. Add a small splash of grenadine if desired for extra sweetness and color.
  5. Garnish with a lime wedge and serve cold.


Comments/Questions

We’d love to hear from you! Give us a comment on what you thought or if you have any questions. Check our grilling class calendar to join us at our next one! 
Grilling Classes


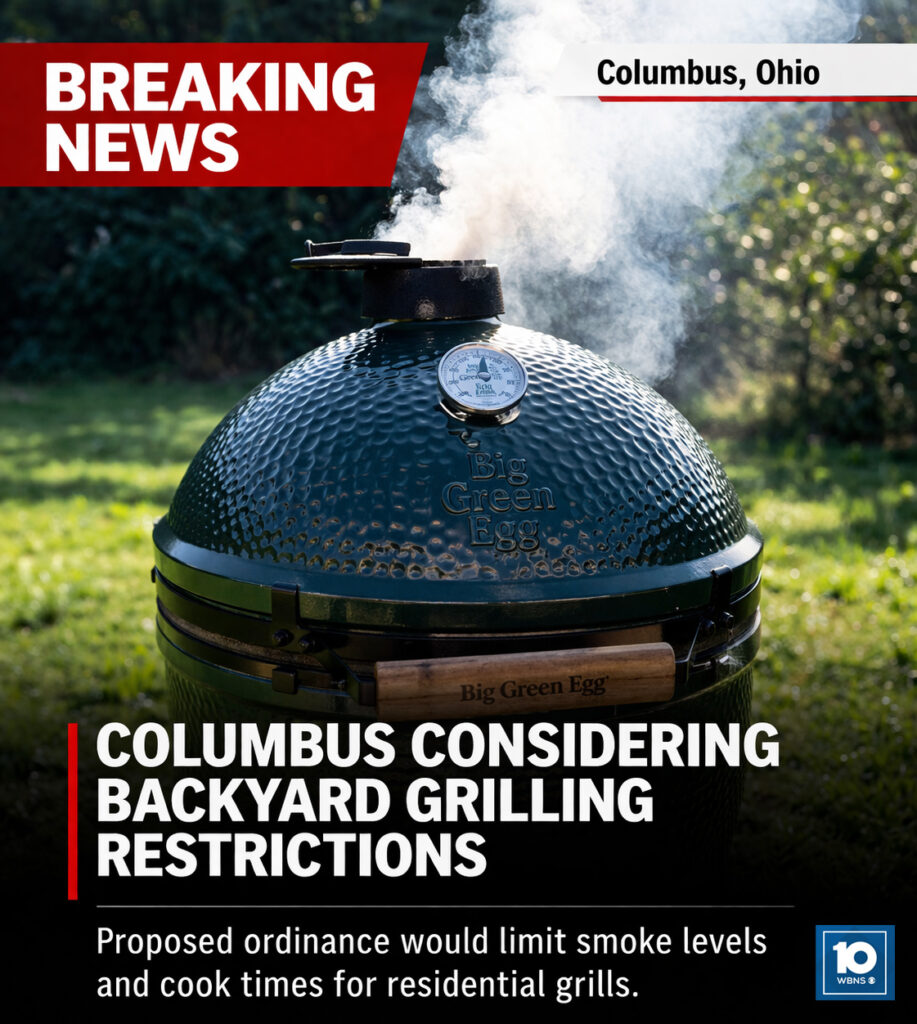
City of Columbus Considering Restrictions on Backyard Grilling

Updated: Mar 31, 2026 / 9:42 AM EDT

COLUMBUS, Ohio — A proposed ordinance could soon change how residents grill in their own backyards.

Residents of Columbus, Ohio may soon see changes to how and when they can grill at home.

A proposed ordinance currently under review would place new restrictions on backyard grilling, including limits on visible smoke and the length of time grills can be in use. The proposal is aimed at addressing an increase in neighborhood complaints related to smoke and air quality.

A city spokesperson said the proposal is intended to address neighborhood air-quality complaints while preserving reasonable outdoor cooking use.

“This is about finding a middle ground,” one official stated. “We want people to enjoy grilling, but also be mindful of how it impacts their neighbors.”


What Could Change

If passed, the ordinance would introduce several new guidelines for residential grilling, including:

  • Restrictions on visible smoke after certain evening hours
  • Limits on longer cooking sessions, such as brisket or pork shoulder
  • Potential fines for repeat violations of smoke-related complaints

While still in the early stages, the proposal has already sparked conversation among local homeowners and grilling enthusiasts.


Residents Divided Over Proposal

Some residents say the proposed changes are a reasonable step toward reducing smoke and improving neighborhood comfort—especially in more densely populated areas of Columbus.

Others, however, feel the restrictions go too far and could impact everyday backyard cooking traditions that many families look forward to, especially during the spring and summer months.

“I get being respectful of your neighbors,” said one Clintonville resident. “But telling someone they can’t grill after a certain time feels like a bit of an overreach.”


Community Reaction

Backyard grilling has long been a part of life in Central Ohio—especially during the spring and summer months. For many, it’s more than just cooking; it’s a way to bring friends and family together.

Local businesses, including Specialty Gas House in Clintonville, have expressed concern about how these changes could impact the grilling community.

“We completely understand being respectful of neighbors,” said Rob Schenz, owner of Specialty Gas House. “But grilling is something that brings people together. It’s hard to imagine telling someone they can’t cook a brisket in their own backyard. I don’t want to live in that world.”


What’s Next

The proposal is still under review, and no final decisions have been made. If approved, the ordinance could take effect later this year.

Until then, many in the community are watching closely—and hoping that backyard grilling remains a staple of life in Columbus.

Grilling Regulation Columbus Ohio

Have your Voice Heard (Sign the Petition)

As discussions continue, residents have an opportunity to weigh in.

👉 [Sign the Petition to Keep Backyard Grilling unrestricted in Columbus]

Johnny Brunet Griddle With Johnny Griddle Grilling Class at Specialty Gas House

Johnny Brunet Grilling Class

Johnny Brunet Grilling Class  – 6/12/25

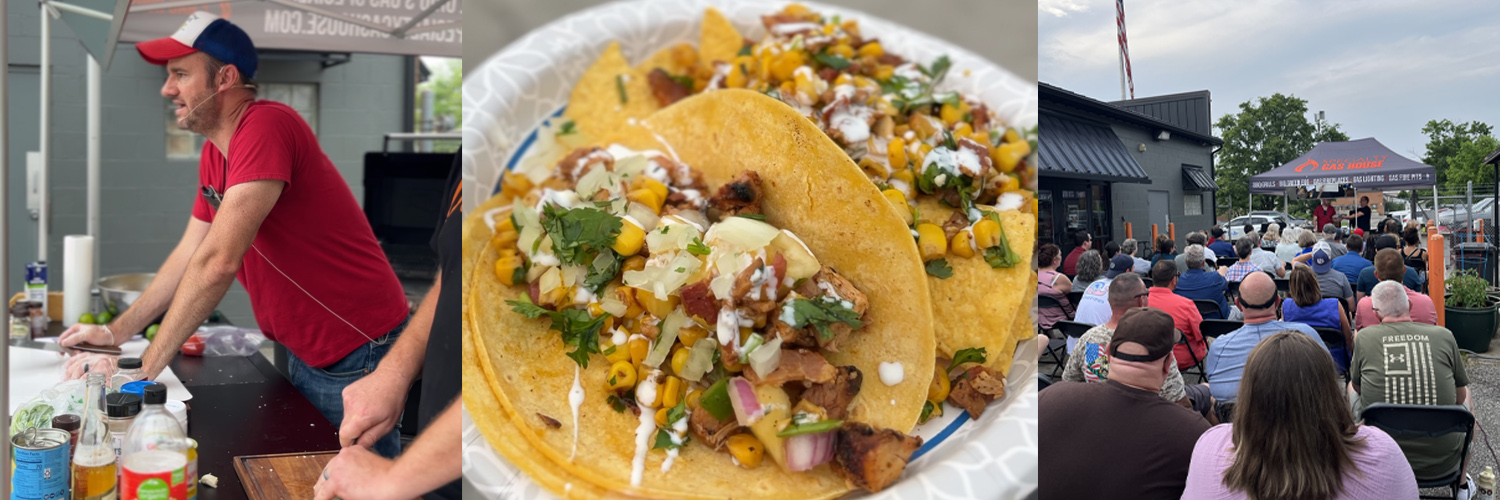
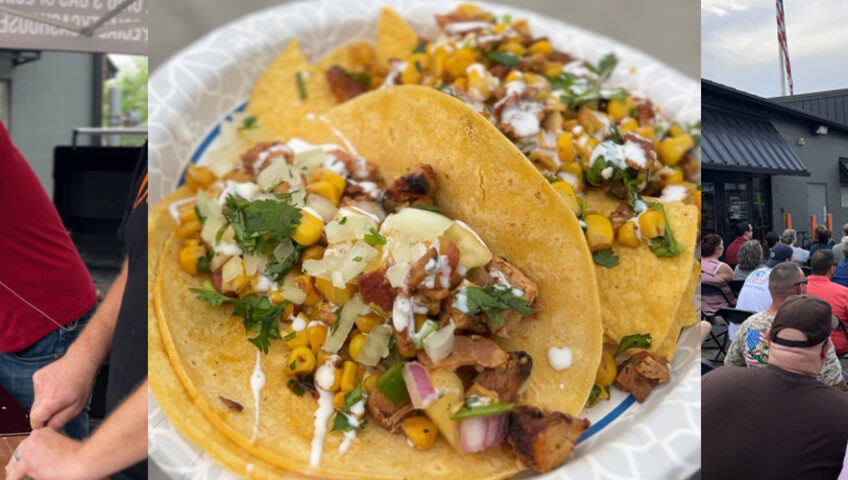
It was a hot June afternoon, the kind of day where your griddle could preheat itself just by sitting in the sun. I arrived at Specialty Gas House expecting a simple cooking class. Maybe a few grill marks, some meat, some fire. You know, civilized things. What I got instead was a spiritual awakening in the form of tacos, corn, and one extremely untrustworthy banana.

Enter Johnny Brunet, known online as “Griddle with Johnny,” aka the man who treats spatulas like nunchucks and cooks like he’s being timed by the gods. He pulled up with a cold Miller High Life in hand, the Champagne of Beers for the King of the Griddle. There were no measurements, no rules, just Johnny, the griddle, and enough grease to give your cardiologist nightmares.

First up were the Lazy Birria Tacos. “Lazy” he called them, but the only thing lazy was my ability to stop eating them. They were dripping with cheesy, meaty goodness, a richness so decadent it could make a grown man weep

Then came the Pineapple Chipotle Chicken Tacos,a sweet and spicy combo that somehow transported me to a tropical beach even though I was standing in a parking lot surrounded by propane tanks. I blacked out halfway through the second one and woke up hugging a bottle of Miller High Life.

As if that wasn’t enough, he fried bacon into corn. Yes, corn. And bacon. Together. I didn’t know whether to eat it or propose to it. I did both.

Finally, he closed it out with a campfire banana split that was so gooey and nostalgic, I called my childhood best friend just to apologize for never making them one.

So yeah, you came here for recipes. But I came here for healing, laughter, and a second helping of banana goo. Scroll down to get the recipes from Johnny’s griddle class, but don’t say I didn’t warn you. Once you cook these, you’ll never look at a griddle the same way again.

Make sure to follow his Griddle 101 YouTube page for amazing recipe and tips on how to use a griddle. https://www.youtube.com/@JohnnyBrunet

Johnny Brunet’s Recipes

Lazy Birria Tacos

Ingredients:

Beef & Seasoning

  • 3 lb chuck roast

  • 7 oz can of smoked chipotles

  • 1 cup beef broth

  • 1 tbsp garlic powder

  • 1 tbsp chili powder

  • 1 tbsp cumin

  • 1 tbsp onion powder

  • 1 tbsp Mexican oregano

Tortillas & Cheese

  • 30 (6-inch) white corn tortillas

  • 16 oz shredded Chihuahua cheese

Toppings

  • 1 bunch cilantro

  • 1 white onion, diced

  • 2 limes, sliced

  • Pickled red onions (optional)

  • Sour cream (optional)

  • Pico de gallo (optional)


Directions:

  1. (Optional) Sear chuck roast in a hot cast iron pan for 2–3 minutes per side until browned.

  2. Transfer roast to a crock pot. Add chipotles, beef broth, and all dry seasonings.

  3. Cover and cook on low for 8 hours or until it easily shreds.

  4. Remove chipotle peppers and shred the beef with two forks. Discard any visible fat.

  5. Preheat the griddle to 375°F and add a little oil.

  6. Dip each tortilla into the birria juices and place on the griddle.

  7. Top each tortilla with cheese and shredded beef (on one side).

  8. Let cheese melt, then fold tortillas in half.

  9. Cook, flipping occasionally, until crispy (about 15–20 minutes total).

  10. Top with diced onion, cilantro, and optional toppings. Serve with lime wedges.


Grilled Pineapple Chipotle Chicken Tacos

Ingredients:

Marinade

  • 1lb Chicken Thighs or Breasts
  • 4 tbsp pineapple juice

  • 2 tbsp apple cider vinegar

  • 1½ tbsp fresh lime juice

  • 3 cloves garlic, minced

  • 1½ tbsp chipotle chili powder

  • 2 tsp dried oregano

  • 2 tsp paprika

  • ¼ tsp ground cinnamon

  • 1 tsp kosher salt

Pineapple Salsa

  • 1 cup chopped fresh pineapple

  • ¼ cup chopped red onion

  • 1 roma tomato, chopped

  • 1 jalapeño, seeded and minced

  • 1 tbsp chopped cilantro

  • 1 tbsp lime juice

  • 1 clove garlic, minced (optional)

  • ½ tsp white sugar

  • ½ tsp salt


Directions:

    1. Mix marinade ingredients in a bowl. Add chicken thighs and refrigerate for at least 1 hour or overnight.

    2. Preheat the grill to medium-high heat and grease the grates.

    3. Remove chicken from marinade and grill for 4–5 minutes per side, until internal temp reaches 165°F.

    4. Let chicken rest for a few minutes, then chop into small pieces.

    5. Warm tortillas on grill or in a skillet for a few seconds per side.

    6. Stack two mini tortillas, then add chicken and pineapple salsa.

    Add optional toppings like sour cream, hot sauce, pico, or pickled onions. Serve with lime wedges.

Bacon Fried Corn

Ingredients:

  • 1 lb thick-cut bacon, diced

  • 2 lbs frozen corn

  • 1 tbsp minced garlic (about 3 cloves)

  • ¼ cup chopped cilantro

  • 2 limes

  • Salt and pepper or Tajín seasoning

  • Cotija cheese (Mexican crumbling cheese)

  • Mexican table cream

  • Crushed Cheetos or tortilla chips

  • Hot sauce 

Directions:

  1. Dice bacon before cooking.

  2. Preheat the griddle to 375–400°F.

  3. Add bacon to a cold griddle and cook until crispy, stirring often.

  4. Scrape off most bacon grease, then add frozen corn.

  5. Toss corn to coat in bacon grease, then spread it out and let it cook undisturbed for 3 minutes.

  6. Flip corn and cook for another 3–5 minutes.

  7. Turn off heat and stir in Tajín and chopped cilantro.

  8. Remove from griddle and top with Cotija cheese, crema, crushed chips, lime juice, and hot sauce.

  9. Serve as a side dish with tacos or eat with chips.


Campfire Banana Splits

Ingredients: 

  • 6 large bananas (unpeeled, stems removed)

  • 2 cups semisweet chocolate chips

  • 1 (10.5 oz) bag miniature marshmallows

Directions:

  1. Preheat the grill or campfire to high heat.

  2. Spray 4 sheets of aluminum foil with cooking spray.

  3. Slice banana peel lengthwise from stem to bottom, keeping the banana in the peel.

  4. Gently open each banana and stuff with chocolate chips and marshmallows.

  5. Wrap bananas in foil and place on grill or directly into coals.

  6. Cook for about 5 minutes, until chocolate and marshmallows are melted.

  7. Unwrap, open peel wide, and eat with a spoon.


Comments/Questions

We’d love to hear from you! Give us a comment on what you thought or if you have any questions. Check our grilling class calendar to join us at our next one! 
Grilling Classes


chef dan varga hungarian butcher specialty gas house grilling class dish

Chef Dan Varga Grilling Class

Chef Dan Varga (The Hungarian Butcher) Grilling Class – 5/15/25

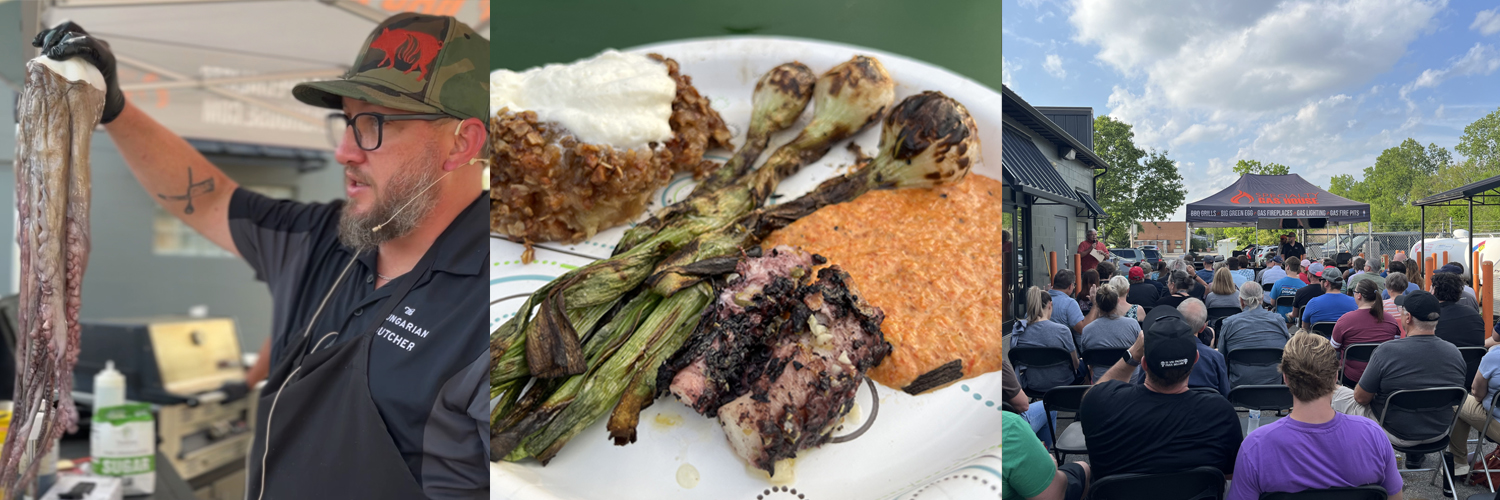
Chef Dan Varga was our host for another sold-out grilling class at Specialty Gas House as part of our ongoing fundraiser classes benefiting Honor Flight Columbus. Chef Dan Varga delivered once again, wowing us with something we’ve never seen done on the Big Green Egg.

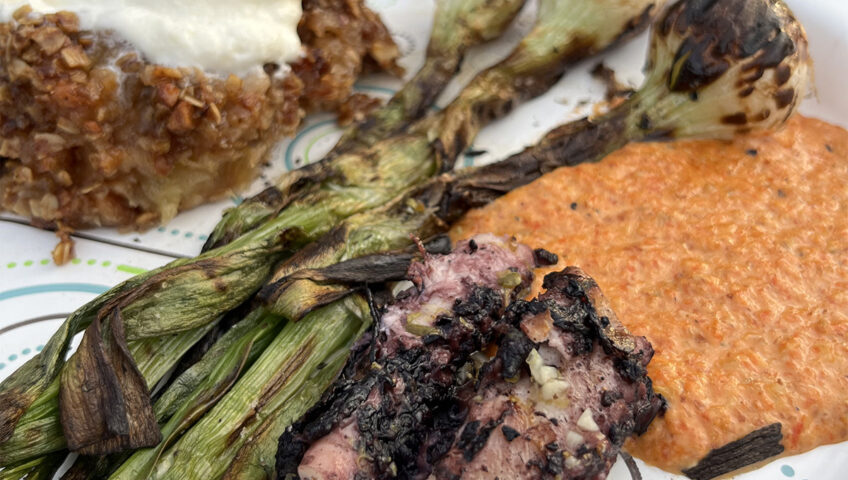
He did a braised and grilled octopus and paired it with charred spring onions with a romesco sauce, and finished with a Brown Sugar, Maple & Cashew Crisp. The evening was packed with flavor, technique, and inspiration. Make sure to visit Chef Dan at his butcher shop, The Hungarian Butcher, in Worthington. 2177 W Granville Rd, Columbus, OH 43085

chef dan varga the hungarian butcher grilling cooking class at specialty gas house

Chef Dan Varga’s Recipes

Charred Spring Onions With Romesco Sauce

Ingredients:

  • 2 Bunches Spring Onions With Green Tops
  • 4-6 Ounces EVOO
  • Salt & Pepper
  • 3 Each Red Pepper
  • ¼ C. Ground Almonds
  • 3 Cloves Garlic

Directions:

  1. Season The Spring Onions With EVOO, Salt, And Pepper.
  2. Grill Onions Over High Heat Until Charred.
  3. Remove From The Grill And Wrap In A Towel Or Butcher Paper. Let Rest 15 Minutes.
  4. Char The Red Pepper Over The Fire Until Black. Let Set In Butcher Paper For 15 Minutes
  5. Peel Charred Skins From Pepper And Remove Seeds
  6. In A Blender Or Food Processor Place The Peppers, Almonds, Garlic.
  7. Puree And Slowly Add The EVOO. Season And Taste.
  8. Serve With The Charred Spring Onions


Braised & Grilled Octopus

Ingredients:

  • 1 Each Large Octopus
  • 2 Bottles Favorite Red Wine
  • 1 Head Crushed Garlic
  • 3 tbs Dried Oregano
  • 3 Ounces Extra Virgin Olive Oil
  • 3 Each Bay Leaves
  • 1tbs Crushed Peppercorns
  • 2 Whole Lemons

Directions:

  1. Put All Ingredients In A Dutch Oven With The Octopus. Cover With A Lid Or Foil.
  2. Cook On The Big Green Egg For Three Hours indirect @300 Degrees
  3. Once Tender Remove From Liquid And Cool.
  4. Grill And Char On High Heat For 5-6 Mins
  5. Season With Salt And Pepper, Olive Oil, Lemon Juice, And Oregano.


Brown Sugar, Maple, Cashew Crisp

Ingredients:

  • 6 Each Large Baking Apples
  • ½ C. Corn Starch
  • 2 C. Brown Sugar
  • 2 C. Quick Oats
  • ¼ C. Maple Syrup
  • 1tbs. Cinnamon
  • 1tbs. Nutmeg

Directions:

  1. Peel And Cut The Apples. Place In Mixing Bowl.
  2. Add The Rest Of The Ingredients. Mix Well And Place Into A Cast Iron Pan Or Oven Safe Casserole Dish.
  3. Top With Crispy Topping Mixture (See below).
  4. Place On The Big Green Egg At 300 Degrees For 60-90 Minutes Until Bubbly.

Cripsy Topping

Ingredients: 

  • ½ # Diced Bacon Cooked Until Crispy And Save All The Bacon Fat
  • 2 C. Brown Sugar
  • 2 C. Quick Oats
  • 2 C. Crushed Cashews
  • 1tbs Cinnamon
  • 1tbs Salt

Directions:

  1. After The Bacon Is Cooked Let Cool Slightly.
  2. Place All Ingredients In A Bowl And Mix Well. Set Aside.


Comments/Questions

We’d love to hear from you! Give us a comment on what you thought or if you have any questions. Check our grilling class calendar to join us at our next one! 
Grilling Classes


Vented Gas Logs vs. Vent-Free (Ventless) Gas Logs: Which Is Right for Your Home?

the difference between vented and ventless vent free gas fireplace log inserts

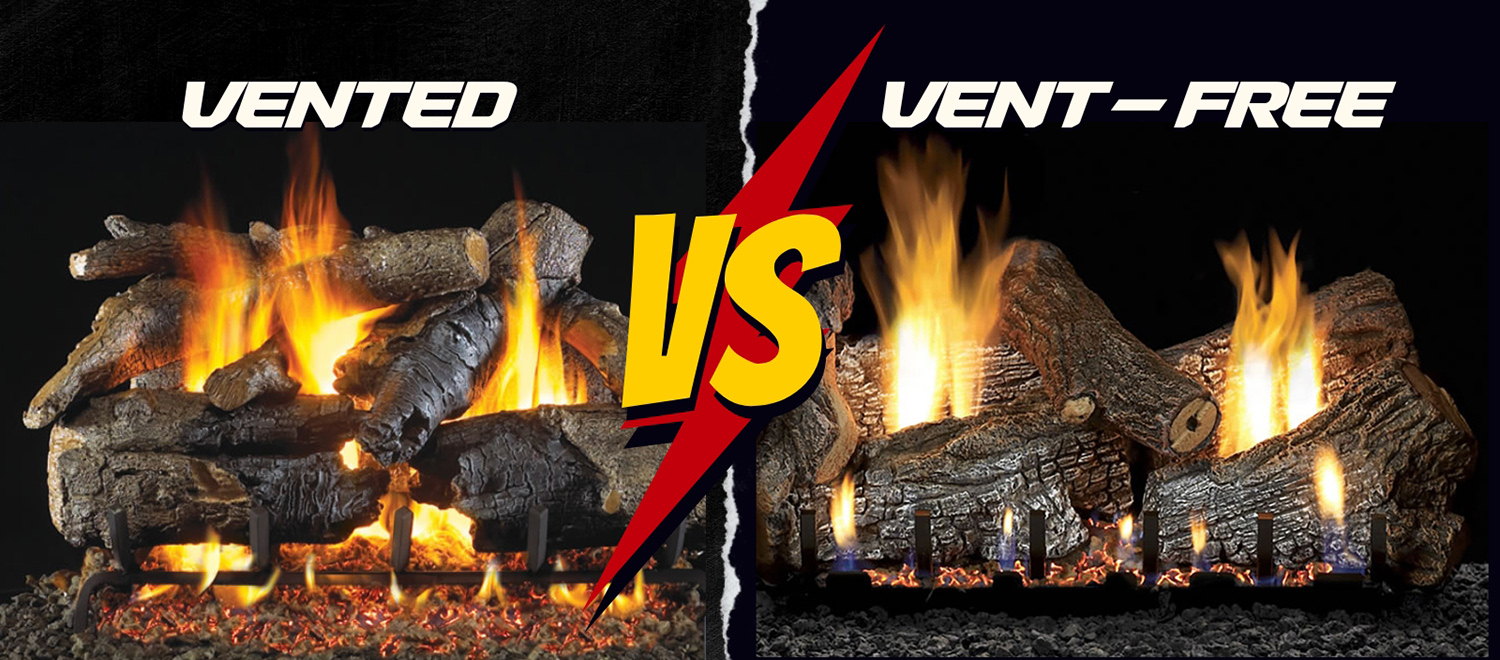
Understanding the Difference Between Vented and Vent-Free Gas Logs

If you’re thinking about adding gas logs to your existing fireplace, you’ve likely encountered two main options: vent-free (also called ventless) and vented gas logs. While both options deliver the warm, inviting glow of a fire, they differ significantly in how they operate, where they are best used, and how they perform. In this article, we’ll break down those differences so you can make an informed choice that fits your home, budget and heating needs.

vented gas log inserts

Vented Gas Logs

How They Work:

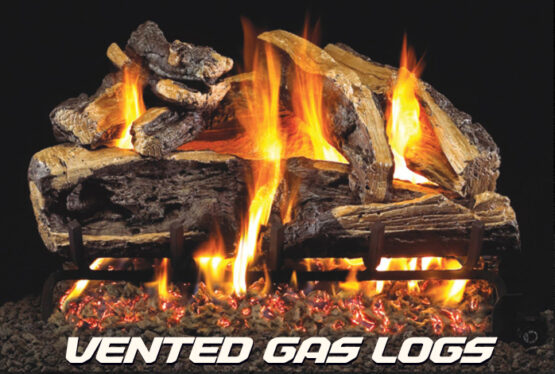
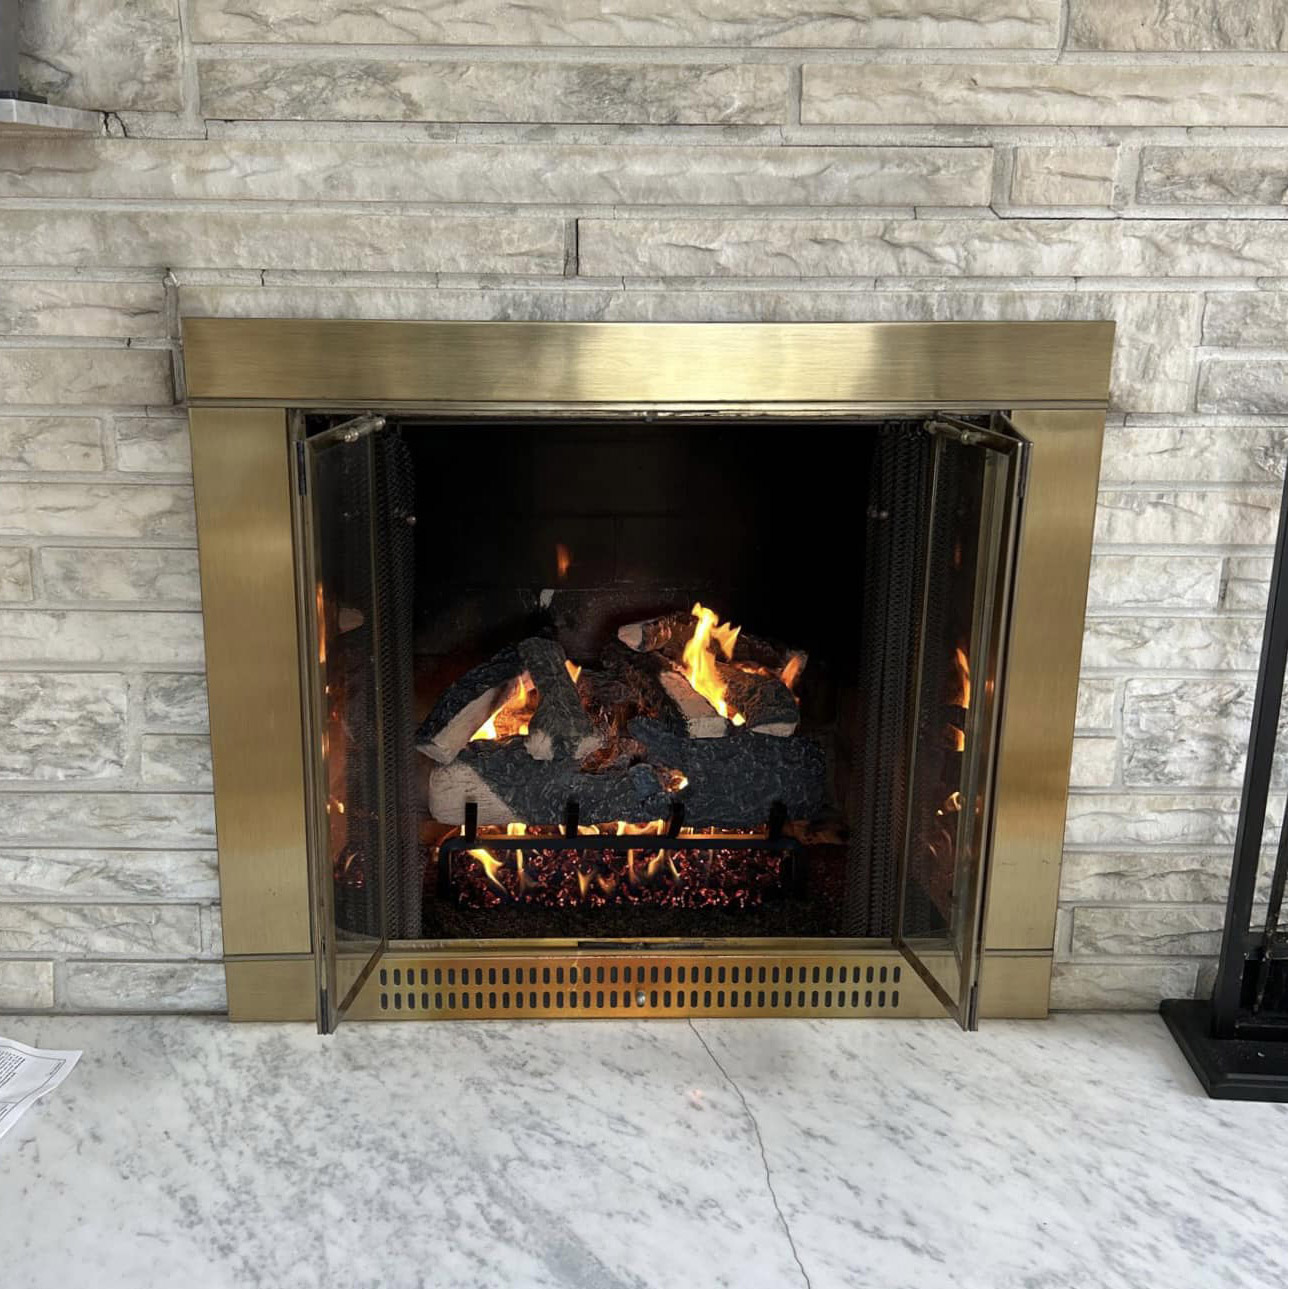
Vented gas logs are designed to mimic the look and feel of a traditional wood-burning fire without the hassle or smell. They require a wood-burning fireplace with an open damper to operate, allowing combustion gases to escape safely outside. Vented gas logs will give you the most realistic look when it comes to a gas fireplace. You’ll enjoy a large, vibrant flame that beautifully wraps around the logs, creating a realistic and natural fire experience. While they give you the most realistic look, they are the least efficient gas fireplace and they provide minimal heat because most of the heat goes up the chimney. See more of the pros & cons of vented gas logs below. 

Pros:
  • Aesthetic Appeal: Vented gas logs produce a more realistic flame pattern, with taller, more natural-looking flames. This makes them ideal for homeowners who prioritize the appearance of their fireplace over heat and efficiency.
  • Versatile Design: There are many different log configurations to choose from and you can actually place the logs where you think they look best. Glass, rock and other more modern options are available. 
  • Safe for Long-Term Use: Since they require a vent, combustion gases, including carbon monoxide, are directed outside your home, reducing any risk of buildup.
  • Limited Need for Service: Vented gas logs don’t require much maintenance because their burners are pretty simple to operate and not much can go wrong with them. Unlike ventless gas logs, which require more frequent cleaning to prevent clogging and to maintain safe indoor air quality. Occasional cleaning of the carbon build up on the logs and inspection of gas fittings may be needed, but the burner & logs themselves are generally maintenance-free.
Cons:
  • Less Efficient for Heating: Because nearly all of the heat escapes through the chimney, vented gas logs are primarily for ambiance rather than heat efficiency.
  • Requires a Chimney or Flue: Homes without an existing chimney will need to install one or opt for a different type of system, adding to the cost. Your chimney must also be in perfect shape, making sure it vents correctly without any issues so all of the fumes escape to the outside. 
  • Costs more to Operate: Vented gas logs use on average 90k BTU’s per hour which is roughly 3x more gas than vent-free. If you plan to operate a vented gas log fireplace regularly you will see a significat rise in your gas bill.
vent-free ventless gas log fireplace inserts

Vent-free (Ventless) Gas Logs

How They Work:

Vent-free gas logs are designed to burn gas extremely efficiently, producing very little combustion byproducts. Because of this, they don’t require an open chimney or vent, which means you can keep your damper closed and the heat will stay inside your home instead of being vented up the chimney. The combustion process is highly efficient, generating heat while minimizing the amount of gas consumed.

Vent Free burners end up producing minimal byproducts like water vapor and carbon dioxide (CO2), both of which can be safely dispersed into a room in the small amount these burners produce. Each vent-free burner is also set up with safety features like an oxygen depletion sensor which tests the oxygen levels in the room and will shut the burner off if it gets below a certain level.

Vent-free gas logs are known for their high heat output. Since they do not lose heat through a venting system, they can effectively warm a room more efficiently than vented gas logs. Vent-free gas logs offer a practical and effective supplemental heating solution that combines efficiency with the cozy ambiance of a traditional fireplace, making them a popular choice for many homeowners.

Pros:
  • High Efficiency for Heating: Since no heat is lost through a vent or chimney, ventless gas logs are 99% efficient and can effectively heat a room. This makes them a great choice for supplemental heating.
  • Costs less to Operate: Vent-free gas logs use only a third of the gas required by vented gas logs, operating at 24,000 BTU’s on low and 36,000 BTU’s on high. Because of this efficient fuel usage and the ability to keep the heat they produce, you’re unlikely to see a noticeable increase in your gas bill.
  • Versatile: When installed in a wood-burning fireplace, vent-free gas logs offer flexibility in how you manage the heat. With the damper completely closed, all the heat stays in the room, maximizing warmth. If you prefer some ventilation, you can open the damper partially or fully, allowing heat to escape through the chimney. This setup lets you choose whether to keep all, some, or none of the heat indoors.
  • Great option for Damaged Chimneys: If your chimney doesn’t draft properly or requires a costly new liner due to cracks, vent-free gas logs can be a economical alternative. By installing vent-free logs, you can avoid the expense of a new liner and still enjoy safe operation. You will still have the flexibility to either vent them through the chimney or close the damper to retain more heat in your space.
  • No Venting Required: As the name suggests, vent-free logs do not require a chimney or flue for installation, allowing for greater flexibility in placement. This makes them ideal for homes without existing fireplaces or in rooms where venting would be impractical.
  • Environmentally Friendly: Because of their clean-burning design, they produce fewer emissions than vented gas logs, making them more eco-friendly.
  • Emergency Heat Source: Since gas logs don’t rely on electricity, vent-free gas logs will keep running even during a power outage, providing an efficient backup heating option when you need it most.
Cons:
  • Less Realistic Flame: The flame patterns of ventless gas logs tend to be smaller and less natural compared to vented logs, though newer models have made significant improvements in this area.
  • Odor: Some users notice an odor when vent-free is in use. This smell is generally a byproduct of the way vent-free fireplaces operate. The odor can sometimes come from contaminates that are in the room. In homes where air contains certain contaminants, like if you recently painted, have strong smelling candles burning or air fresheners, these particles can be drawn into the burner and put off an unpleasant smell. This odor can be removed by simply not burning candles and removing air fresheners. For many people, the smell of vent-free is subtle and not bothersome, but sensitive users may notice it more. If the smell is particularly strong, that could indicate an issue, like incorrect installation or something affecting the air quality in the room, so it’s always wise to consult a professional if there are any concerns.
  • Requires More Routine Maintenance: Vent-free gas logs require more maintenance than vented gas logs. Since they use room air for combustion, the oxygen depletion sensor can become clogged over time and will eventually need cleaning to ensure proper operation. It’s recommended to have vent-free gas logs serviced every 2–3 years.

Which Is Right for You?

Choosing between ventless and vented gas logs depends on your specific needs and preferences. If you’re looking for ambiance and a more realistic flame without a focus on heating, vented gas logs are an excellent choice. On the other hand, if you want an effective supplemental heating solution that’s efficient and cost-effective, ventless gas logs may be the better option.

At Specialty Gas House, we offer both vented and ventless gas log systems and if you live in Columbus, Ohio we can help you determine the best fit for your home. If you’re looking to enhance the aesthetics of your fireplace and live in Columbus, Ohio, we’re here to provide expert advice and installation services.

For more information on gas logs and our other products, feel free to visit our showroom. Our team will be happy to answer any questions you have and guide you through the selection process in our showroom.

birch vent free ventless gas logs installed in a fireplace

Vent-Free

vented gas logs installed in a fireplace

Vented

vent free ventless gas logs installed in a fireplace

Vent-Free

vented gas logs installed in a fireplace

Vented

Interested in upgrading your fireplace?

Take the next step

To get started, please use our measurement sheet and bring your measurements plus a photo of your fireplace to our showroom at 4500 Indianola Ave, Columbus, OH 43214. Prefer to get a quote via email? Send your measurements and photos to tony@specialtygashouse.com.

(Note: we service the Central Ohio area only; we do not ship gas logs.)

chef trudy king grilling cooking class at specialty gas house standing next to a big green egg

Chef Trudy King Grilling Class

Trudy’s Signature Sandwiches Grilling Class – 5/16/24

Chef Trudy King spilled the tea on her signature sandwiches. She showed us how to make a classic Italian, Artichoke Parmesean, & Herbed Chicken Sandwich. She also made some rose lemonade and candied walnuts. All of these sandwiches are intended to be made on French bread that has been grilled and or Panini pressed. Enjoy the recipes and don’t sleep on the artichoke veggie one, that was the crowd favorite at the class!

chef trudy king grilling cooking class at specialty gas house on may 16th 2024 sandwich recipes

Trudy’s Signature Sandwiches Recipes


Artichoke Parmesan 

Ingredients:

  • 1 Can Large Artichoke Hearts
  • 1 8oz can Baby Bella Mushrooms
  • 1 Vidalia Onion
  • 3oz Banana Peppers (or to taste)
  • Smear Dressing or Mayo (See below for smear dressing recipe)
  • Dry Ranch Seasoning
  • Oregeno & red pepper flakes or Italian seasoning
  • Grated Parmesan Cheese
  • French Bread

Directions:

Smear Recipe:

  • Equal parts mayo & cream cheese warmed until homogeneous with dry ranch seasoning.

Sandwich Directions:

  1. Slice Onion and mushrooms. Saute on a griddle, cast iron or nonstick pan until onions are soft and some caramelization appears on mushrooms and onions. Season with oregano and a pinch of red pepper flakes or Italian seasoning.
  2. Spread mayo or the smear dressing on both sides of the bread.
  3. Close the bread and season the outside with ranch seasoning. Grill bread on the outside until grill marks appear and it toasts up a bit.
  4. Once toasted, liberally pour grated parmesan onto one side of the bread. Creating little “ant hills”
  5. Top with artichoke and mushrooms and enjoy!


Classic Italian aka “The Italian Job”:

Ingredients:

  • 5 slices of salami
  • 3 slices of pepperoni
  • 3 slices of black forest ham or Canadian bacon
  • 3 oz banana peppers (or to taste)
  • Saute Dressing (Balsamic Dressing mixed with red pepper flakes & oregeno or Malcolm’s Italian Stallion Seasoning)
  • Mayo
  • Muenster Cheese
  • Thinly sliced Vidalia onion
  • Thinly sliced tomato
  • Dry Ranch Seasoning
  • Oregeno & Red Pepper Flakes or Italian Seasoning
  • Spinach
  • French Bread

Directions:

  1. Grill/Saute the meats with banana peppers and onions slightly for a couple of minutes. Season with oregano and a pinch of red pepper flakes or Italian seasoning and pour on a bit of balsamic dressing when sauteing.
  2. Spread mayo on the bread and sprinkle with Italian Seasoning and then top with cheese. 
  3. Close the bread together and season one side of the bread with ranch seasoning. Grill bread on the outside until grill marks appear and it toasts up a bit and the cheese melts slightly.
  4. Evenly distribute the meat and veggies on the bread so you get equal parts in every bite.
  5. Top with a layer of spinach and sliced tomatoes.
  6. Enjoy!


Herbed Chicken: 

Ingredients:

  • Pulled Rotisserie Chicken or Grilled Chicken Thighs. 
  • Mayo
  • Muenstar Cheese
  • Dry Ranch Seasoning or Everything Bagel Seasoning
  • Spinach
  • Thinly Sliced Tomatoes
  • JJ’s Rosemary Roastin Rub
  • French Bread

Directions:

  1. Spread mayo on the bread and top with cheese. 
  2. Season the outside of one side of bread with ranch seasoning. Grill bread on the outside until grill marks appear and it toasts up a bit and the cheese melts slightly.
  3. Shred rotisserie chicken. If making your own chicken, season with JJ’s Roastin Rosemary Rub and cook to your liking. We like whole roasting a chicken indirect on the Big Green Egg at 350 degrees until the chicken breast reaches an internal temperature of 165. Grilled chicken thighs works well too!
  4. Add the chicken to the bread and top with a layer of spinach and sliced tomatoes.
  5. Enjoy!


Candied Walnuts:

Ingredients: 

  • 4 Cups Walnuts
  • 2 TBS Worcestershire sauce (or a vinegar BBQ sauce like Malcolm Reeds)
  • 1 TBS Habanero Cherry Seasoning or Similar
  • 1/4 Cup Brown Sugar

Directions:

  1. Mix all of the ingredients together and cook on a pan with parchment paper in the Big Green Egg indirect at 300 degrees for 15-20 minutes. Feel free to use your oven.


Rose Lemonade:

Ingredients: 

  • 2 Cups Rose Flower Tea (Rose Petals Bought at Saraga or North Market Spices)
  • 1 Cup Granulated Sugar or Honey
  • 1/2 Cup Fresh Squeezed Lemon Juice

Directions:

  1. Grind Rose Petals and steep with 200 degree water for about 20 minutes.
  2. Drain the debris from the rose petals.
  3. Combine the tea with the sugar and lemon juice until the sugar has dissolved.
  4. Chill and enjoy!


Comments/Questions

We’d love to hear from you! Give us a comment on what you thought or if you have any questions. Check our grilling class calendar to join us at our next one! 
Grilling Classes


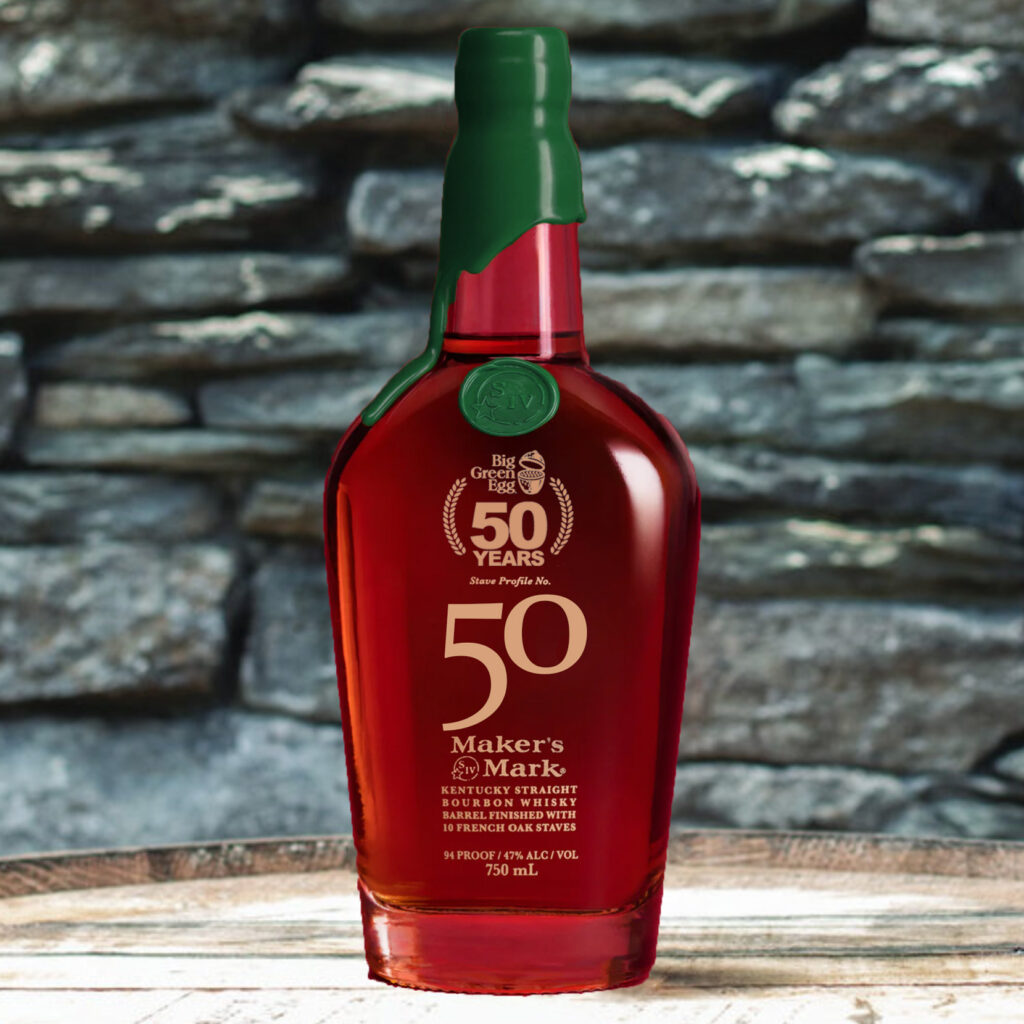
Big Green Egg and Maker’s Mark Collaborate to Celebrate Big Green Egg’s 50th Anniversary with a Special Bourbon

Big Green Egg & Maker’s Mark

In a thrilling celebration of culinary innovation and craftsmanship, The Big Green Egg grill company and Maker’s Mark have joined forces to create a limited-edition bourbon, marking Big Green Egg’s remarkable 50-year journey in revolutionizing outdoor cooking.

The collaboration between these two iconic brands is a tribute to the artistry and passion that have defined their respective industries. As Big Green Egg enthusiasts know, the company has been at the forefront of outdoor cooking since its inception in 1974, with its ceramic grills setting a new standard for versatility, flavor, and performance.

Likewise, Maker’s Mark, a renowned name in the bourbon world, has been synonymous with excellence and tradition. Their commitment to quality and time-honored techniques has made them a favorite among whiskey connoisseurs worldwide.

big green egg makers mark bourbon collaboration for 50th anniversary

A Celebration of Craftsmanship

The Big Green Egg and Maker’s Mark collaboration bourbon is not just a drink; it’s a celebration of craftsmanship and a testament to the art of slow, flavorful cooking. This special bourbon is crafted with the same dedication and attention to detail that both brands are known for, resulting in a unique flavor profile that captures the essence of outdoor cooking and bourbon craftsmanship.

“We are thrilled to partner with Maker’s Mark to commemorate our 50th anniversary,” says Fred Swisher, Founder of Big Green Egg. “This collaboration represents our shared values of quality, innovation, and a deep-rooted passion for bringing people together through exceptional food and drink experiences.”

The limited-edition bourbon will be available at select dealers and consumers will be able to enter a lottery to try and win the ability to purchase a bottle. Each bottle is a collector’s item, encapsulating the spirit of collaboration and the joy of outdoor cooking. You can enter the lottery here — https://bit.ly/BigGreenEggBourbon

“We are proud to collaborate with The Big Green Egg on this special project,” says Rob Famuels, Managing Director of Maker’s Mark. “This bourbon is a tribute to our shared commitment to craftsmanship and the joy of creating memorable moments around the grill.”

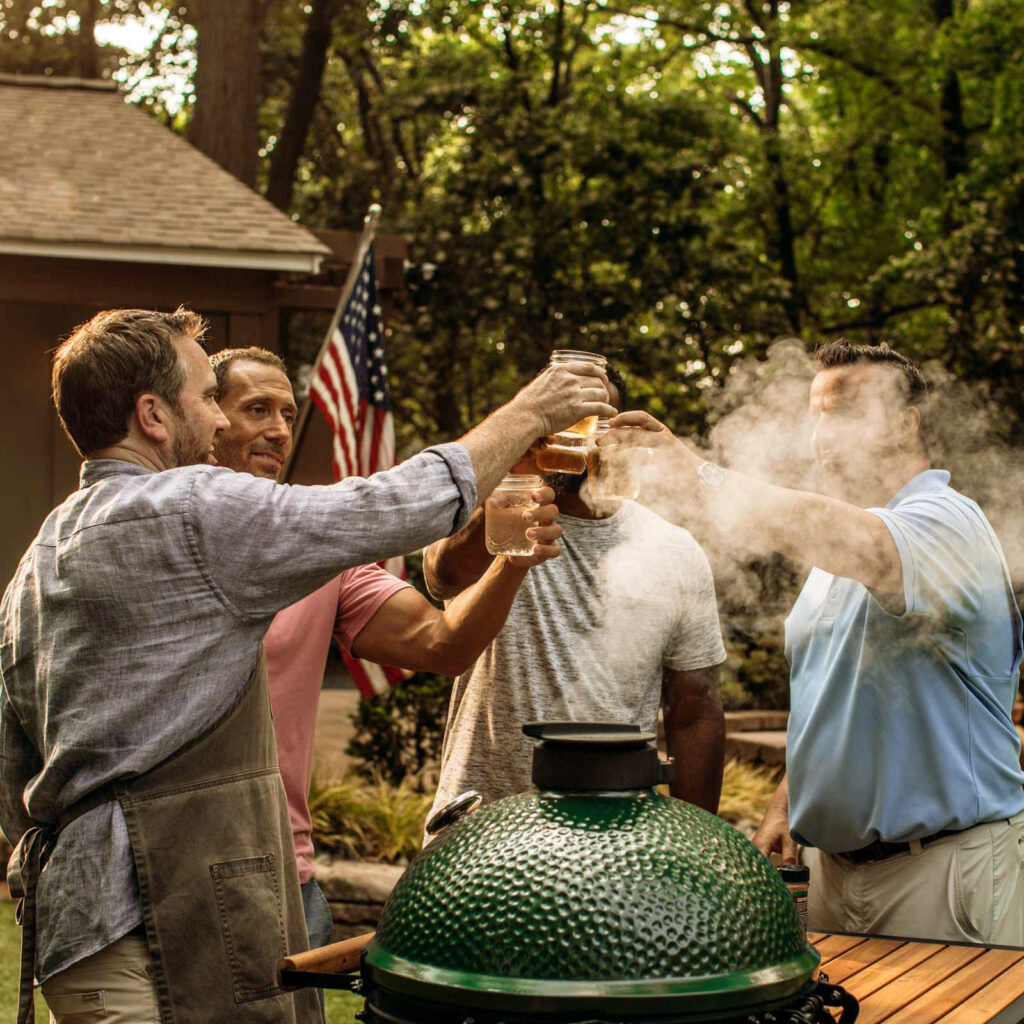
As the world celebrates Big Green Egg’s 50th anniversary, this collaboration bourbon serves as a reminder of the enduring legacy of innovation, creativity, and camaraderie that both brands embody. Raise a glass to 50 years of exceptional outdoor cooking and the exciting flavors that lie ahead with The Big Green Egg and Maker’s Mark collaboration bourbon. Cheers to a partnership forged in flavor and fueled by passion! Enter the lottery here for a chance at receiving one of these limited edition bottles.

big green egg makers mark bourbon special limited edition bourbon collaboration 50th anniversary
big green egg cheers

Follow us for more Bourbon & Barbecue!

What do you think of this collaboration? Will you be trying to snag a bottle?

How to fix your Everwarm Fireplace Remote. (Model 4001TH-A)

everwarm model 4001th-a gas fireplace remote help

Troubleshooting your Everwarm Fireplace Remote. (Model # 4001TH-A)

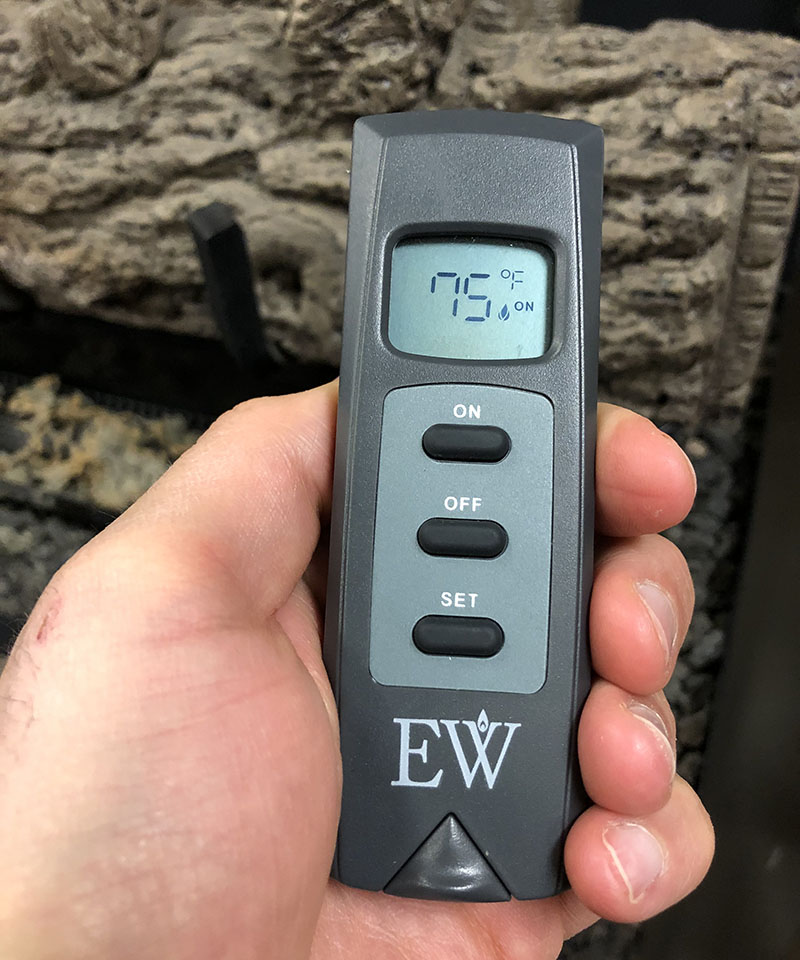
**This is for models 2021 and newer. You can find the model number on the back of the remote. It will read 4001THA.  If your remote is grey and black, was purchased before 2021 or has the model number SKY-4001TH, please visit this page to learn how to fix your remote. Click here>>


First, change the batteries in the remote AND receiver box. (see pictures & video below for more help)
  1. Find your remote.
  2. The battery for the remote slides out the bottom of the remote.
  3. DO NOT remove the screw on the back of the remote. 
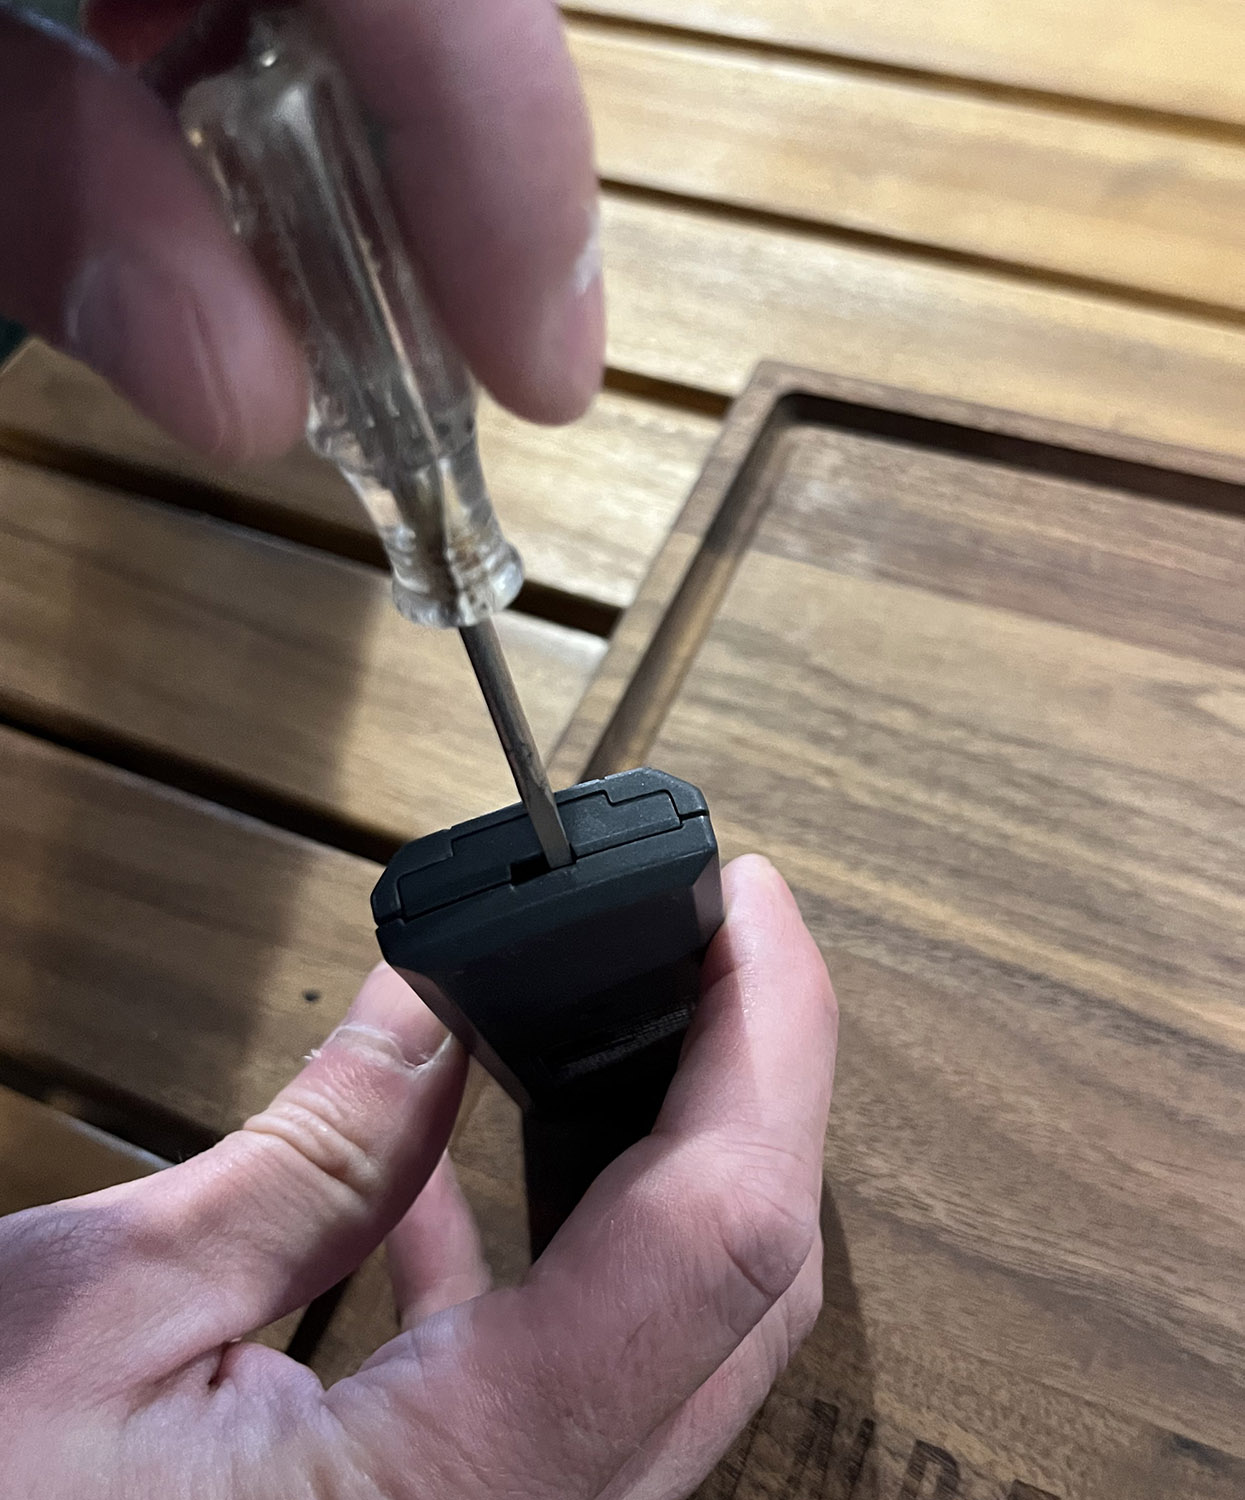
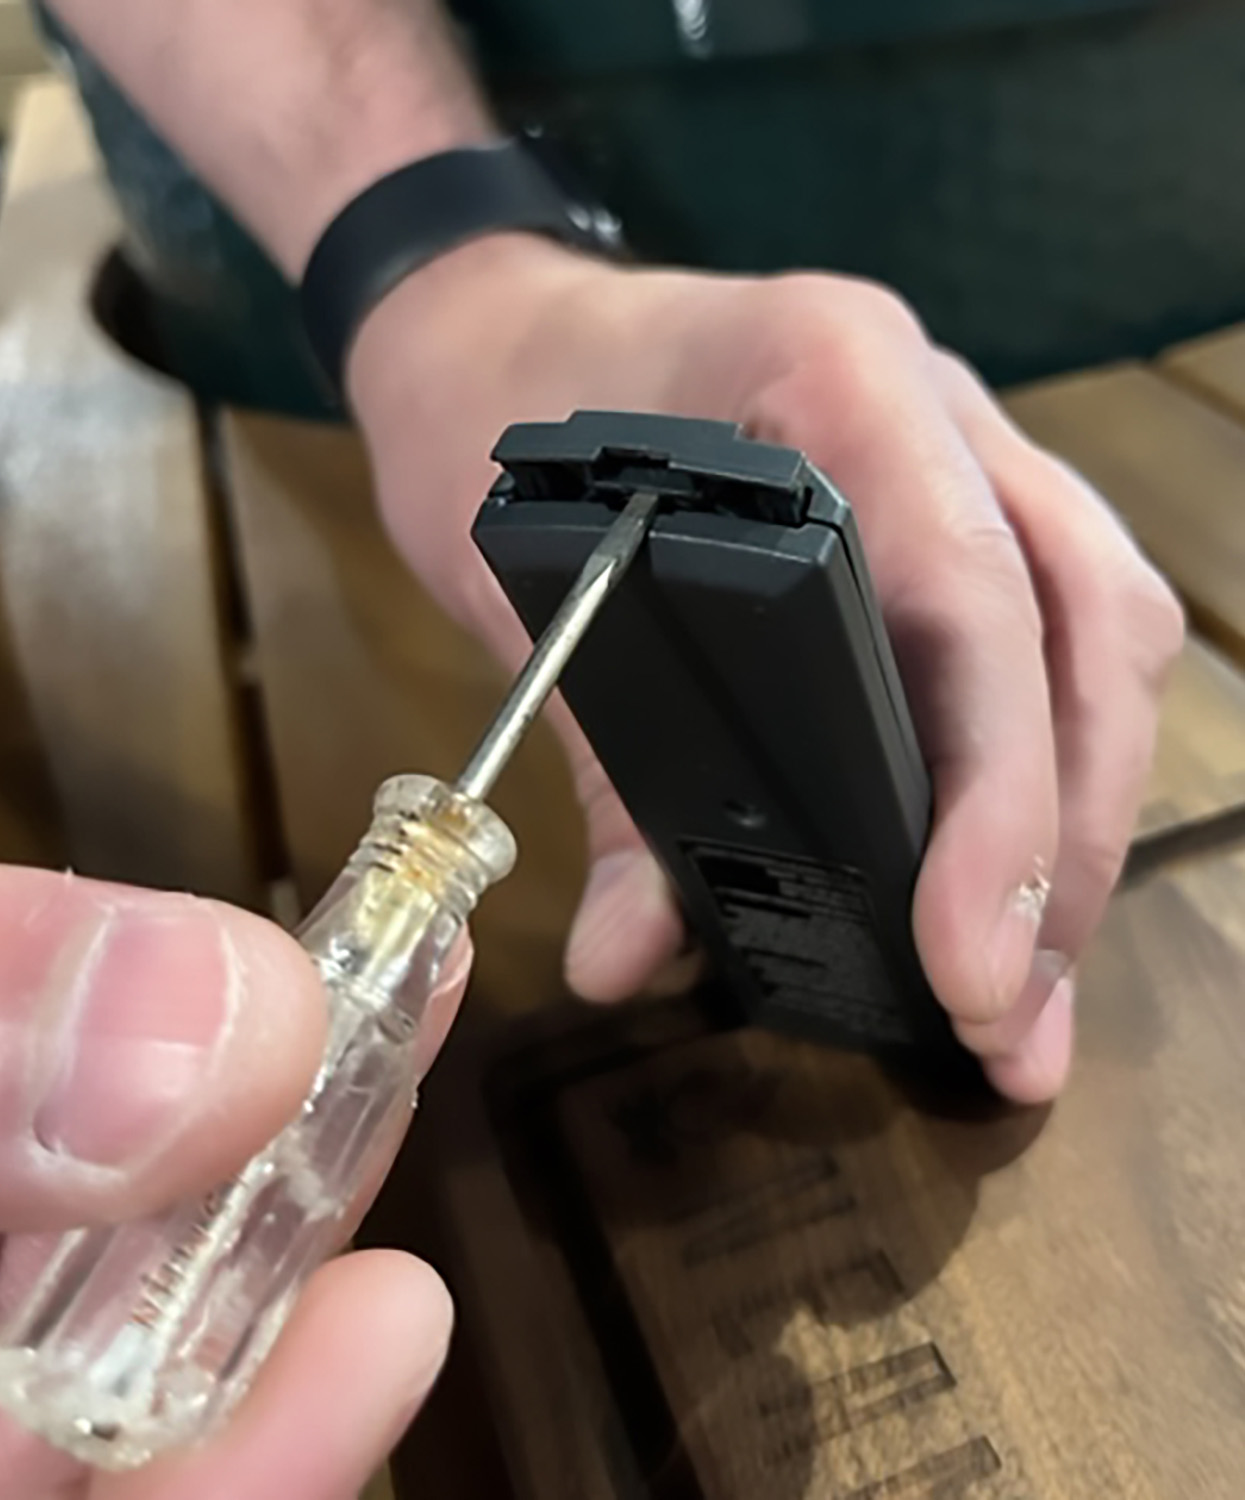
  4. You will need a small screwdriver to remove the battery compartment. You will see a little notch at the bottom of your remote, stick the screwdriver in there and pull the battery compartment out to reveal the battery. (See pictures below)
  5. Replace the battery with a CR2032 battery.
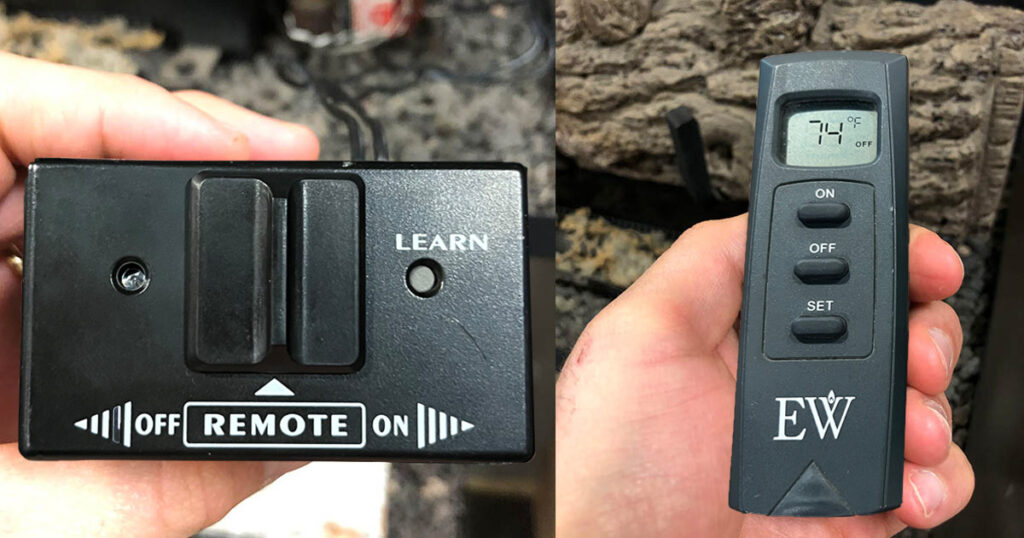
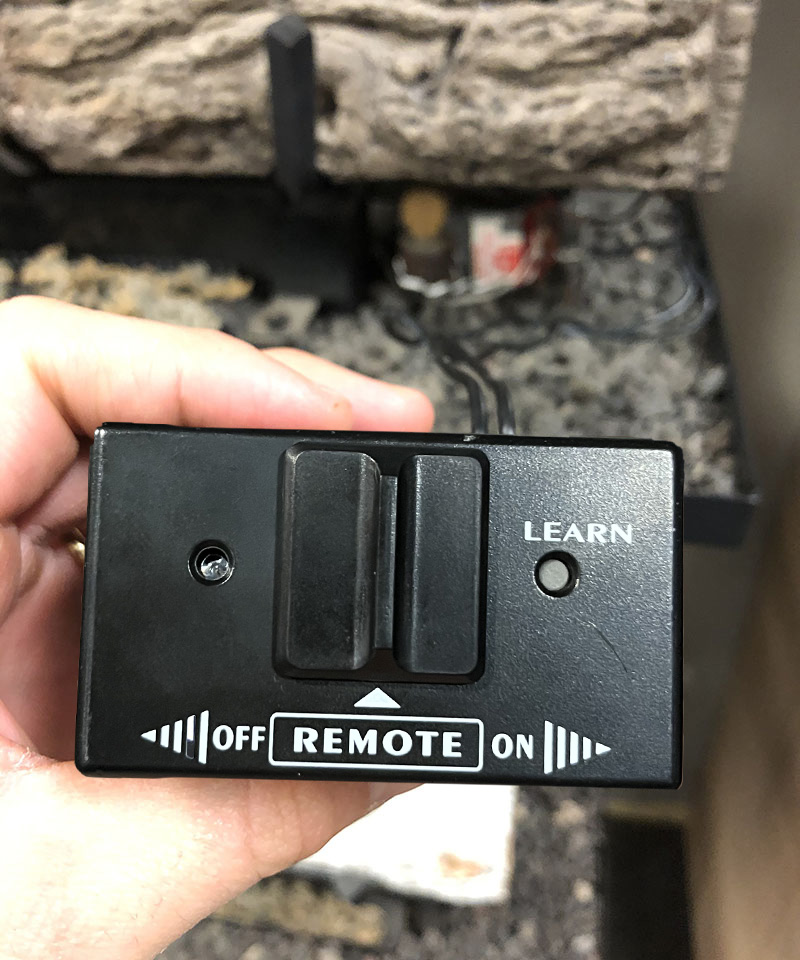
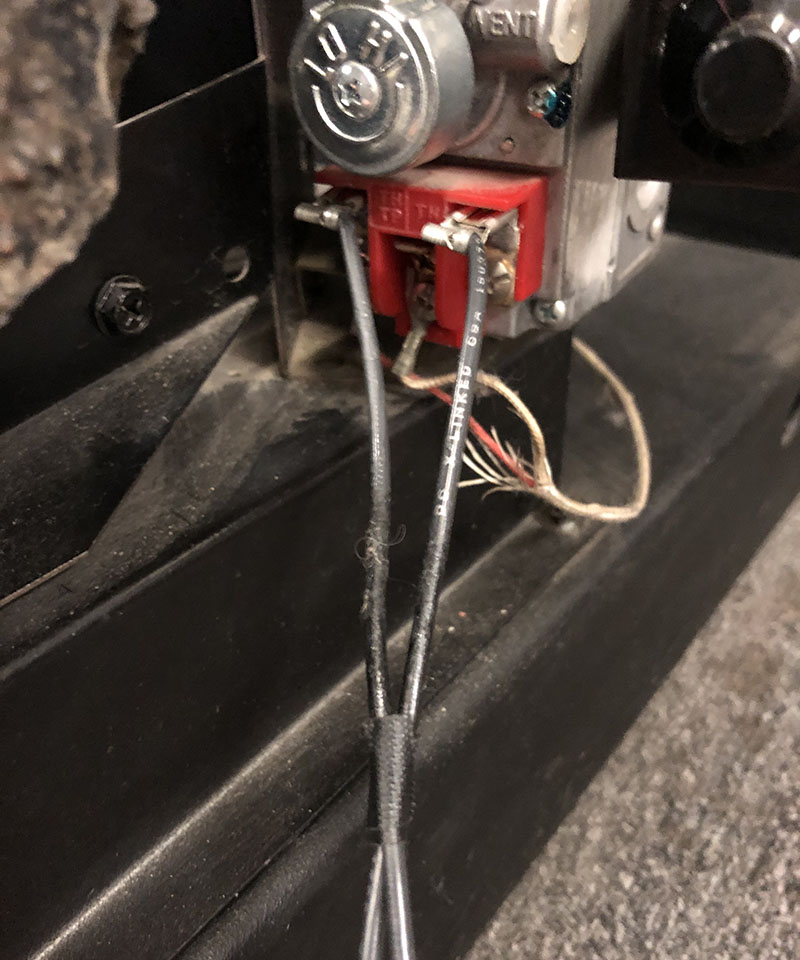
  6. Find the receiver box. It should be in the back corner of your fireplace, it has 2 wires attached to the control valve of your fireplace.
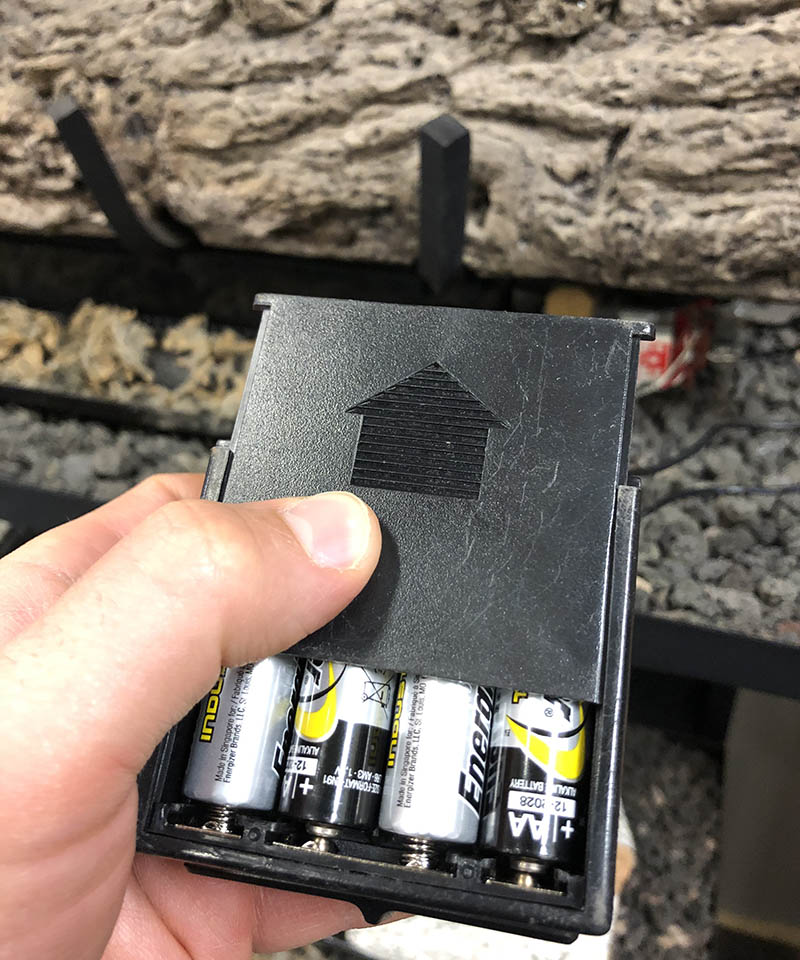
  7. Turn the receiver box over to reveal an arrow.
  8. Slide the bottom of the box with your thumb to reveal the batteries.
  9. Replace the batteries with NEW AA batteries.
  10. Once the batteries are changed in both the remote and receiver box, make sure the receiver box is set to REMOTE.
  11. Now hit ‘on’ with the remote and your main burner should light.
  12. If the fireplace turned on you’re all set! If it did not, continue below.
If your fireplace still won’t light, follow the steps below. (Check to see if the remote works after every step.)
  1. If you changed the batteries in both your remote and receiver box and it still won’t light, try these next steps to troubleshoot.
  2. Make sure the pilot is lit. If pilot is not, click HERE for instructions on how to light your pilot.
  3. Make sure your control valve (knob that says off, on and pilot) is in the ON position and not in PILOT.
  4. Make sure the remote receiver (black box in the fireplace) is in the REMOTE position.
  5. If the remote is still not turning the fireplace on, slide the receiver box to the on position.
  6. If the fireplace lit, but it won’t light in the remote position, the remote may need to be replaced.
  7. If the fireplace still did not light, check the connections from your receiver box to the control valve, and make sure they are attached and not loose.
  8. If you tried all of these steps and the fire still did not light, you may need service.
  9. The intakes on the burner and pilot may have gotten clogged with dust, pet hair and pet dander and the unit is not getting enough clean air to work properly. Vent-free units need to be serviced every 2-3 years.


How to sync your Everwarm EW4001TH-A fireplace remote to your receiver box. 

If you think the remote and receiver are not communicating with each other, use this method to sync them. 

  1. Make sure the receiver box is in the REMOTE position.
  2. Using a pencil or small screwdriver, hit the learn button on your receiver box. (You should see the red light start to blink)
  3. Then on your remote hit ON. 
  4. Your remote should now be synced and you should be able to turn the fireplace on using the remote. 


If you still can’t figure out the remote, we can test the remote and receiver box in our showroom in Columbus, Ohio. We also do in-house service calls if you live near central Ohio. For us to test your fireplace remote in our showroom, you would need to bring us the remote, receiver box, and wires for us to be able to test it. The receiver box and 2 wires will unplug from your control valve.

*If you don’t live in Columbus, Ohio, you can purchase a new remote online hereNew Everwarm Fireplace Remote

NEW REMOTE


new everwarm model number 4001th-a fireplace remote
everwarm ew4001th-a how to take the battery out of the remote
everwarm ew4001th fireplace remote how to change the batteries out of the remote
model ew4001th-a battery compartment on fireplace remote
everwarm model number 4001th-a gas fireplace remote receiver box
changing batteries in gas fireplace remote ew 4001th-a everwamr
gas fireplace remote batteries for everwarm 4001th-a
fireplace control valve for remote

Interested in a new gas fireplace or remote? visit our showroom in Columbus, Ohio!

 DIRECTIONS

specialty gas house super service award