Grilling Class with The Specialty Gas House Crew
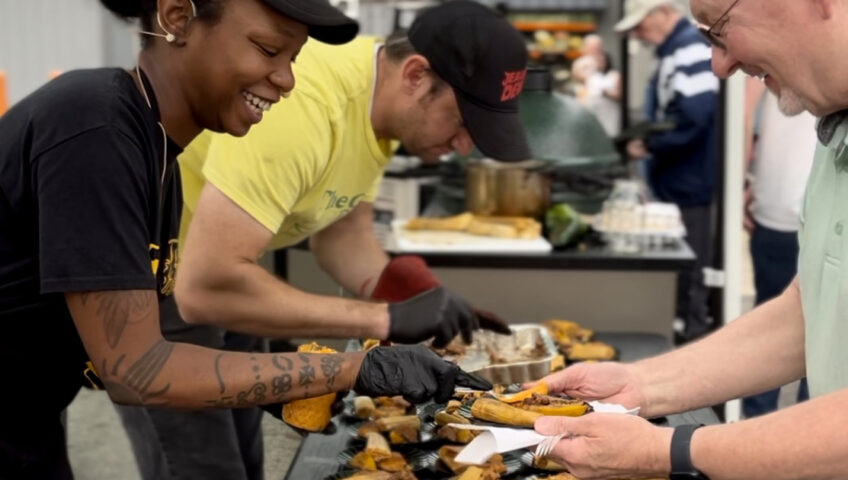
For this class we did something a little different, we didn’t bring in guest chefs, we hosted this class ourselves! We don’t have any formal training but when you are around grills enough you learn a thing or two. For this class, we demonstrated how to bake focaccia bread and roast pork belly on the Big Green Egg. We also did a simple grilled corn on the cob and 3 ingredient peanut butter cookies on the Big Green Egg. Give these a try and let us know what you think!


Grilling Class at Specialty Gas House 8/24/23
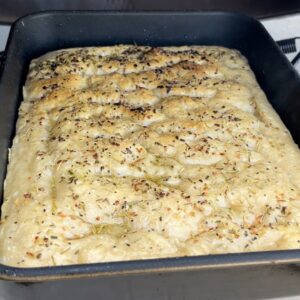
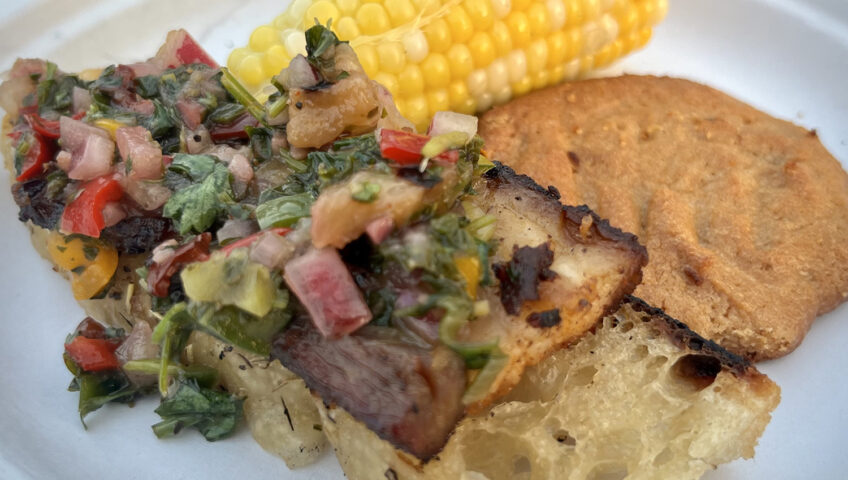
Focaccia Bread
Ingredients:
- 4 cups (512 g) all-purpose flour or bread flour, see notes above
- 2 teaspoons (10 g) kosher salt
- 2 teaspoons (8 g) instant yeast, see notes above if using active dry
- 2 cups (455 g) lukewarm water, made by combining 1/2 cup boiling water with 1 1/2 cups cold water
- 2 tablespoons honey
- butter for greasing
- 4 tablespoons olive oil, divided
- flaky sea salt
- JJ’s Meat Fixin’s Rosemary Roastin Rub (Optional)
Directions:
- In a large bowl, whisk together the flour, salt, honey and instant yeast. Add the water. Using a rubber spatula, mix until the liquid is absorbed and the ingredients form a sticky dough ball. Rub the surface of the dough lightly with olive oil. Cover the bowl with plastic wrap and place in the refrigerator immediately for at least 12 hours or for as long as three days.
- Line two 8 or 9 inch pie plates or a 9×13-inch pan with parchment paper or grease with butter or coat with nonstick cooking spray. Pour a tablespoon of oil into the center of each pan or 2 tablespoons of oil if using the 9×13-inch pan. Using two forks, deflate the dough by releasing it from the sides of the bowl and pulling it toward the center. Rotate the bowl in quarter turns as you deflate, turning the mass into a rough ball.
- Use the forks to split the dough into two equal pieces (or do not split if using the 9×13-inch pan). Place one piece into one of the prepared pans. Roll the dough ball in the oil to coat it all over, forming a rough ball. Repeat with the remaining piece. Let the dough balls rest for 3 to 4 hours depending on the temperature of your kitchen (Note: no need to cover for this room temperature rise).
- Set oven or Big Green Egg with covEGGtor to 425°F. (Here you can add seasoning/herbs to the top of the dough like JJ’s Rosemary Seasoning, fresh rosemary, garlic, tomato slices, etc.) Pour a tablespoon of oil over each round of dough (or two tablespoons if using a 9×13-inch pan). Rub your hands lightly in the oil to coat, then, using all of your fingers, press straight down to create deep dimples. If necessary, gently stretch the dough as you dimple to allow the dough to fill the pan. Sprinkle with flaky sea salt all over.
- Transfer your pan to the oven or Big Green Egg and bake for 25 to 30 minutes, until the underside is golden and crisp. Remove the pan and transfer the focaccia to a cooling rack. Let it cool for 10 minutes before cutting and serving; let it cool completely if you are halving it with the intention of making a sandwich.
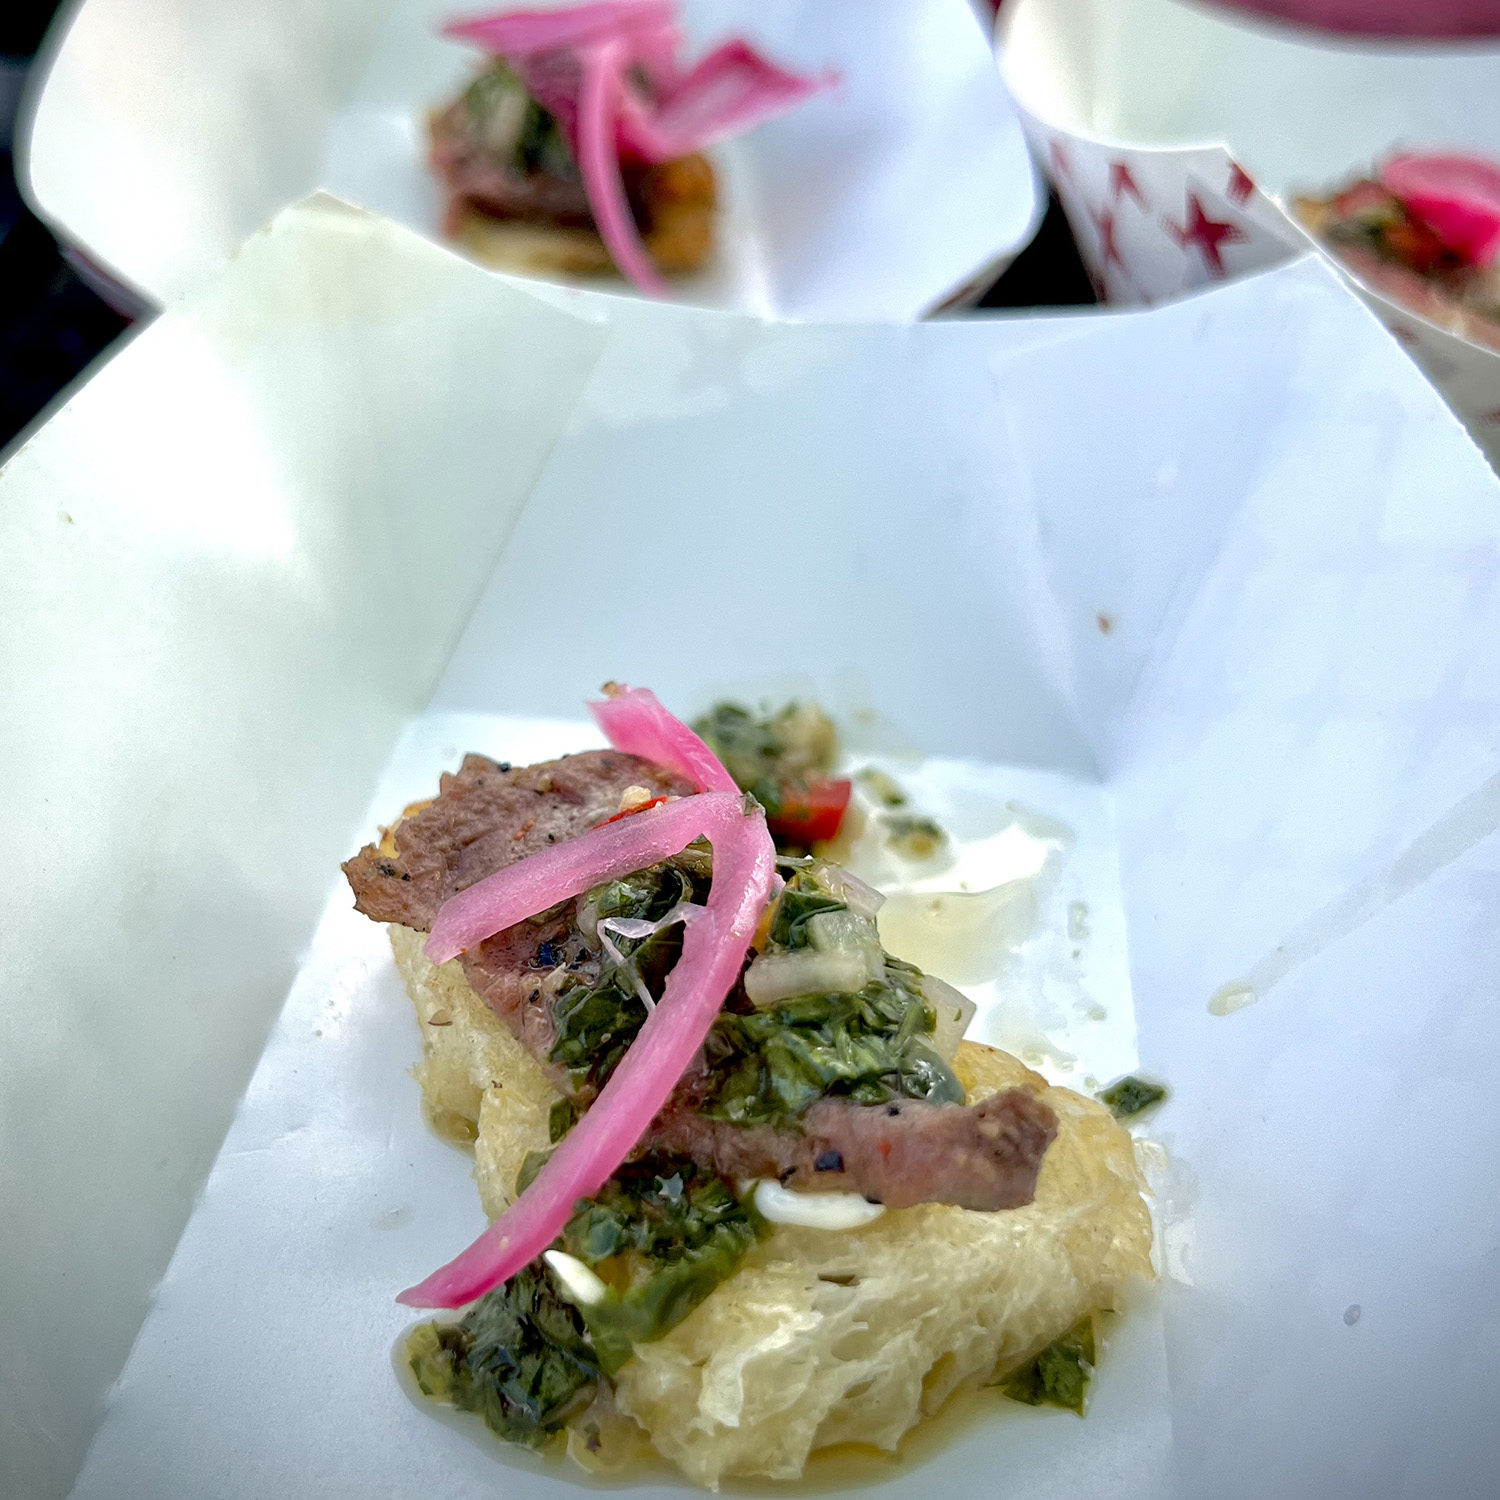
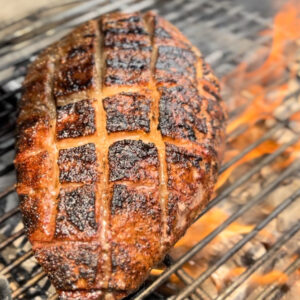
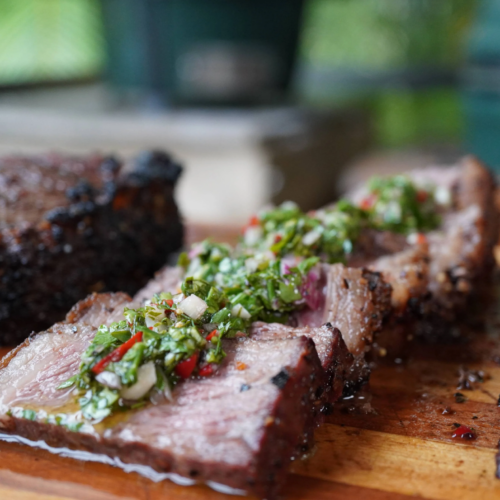
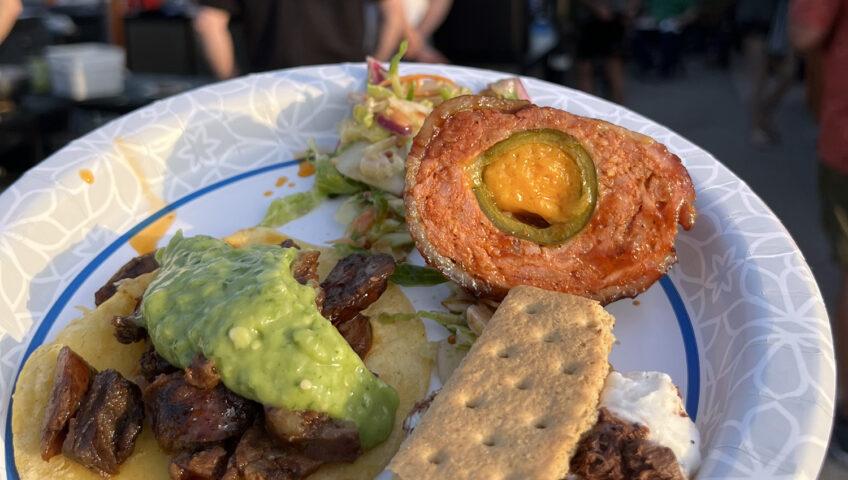
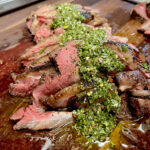
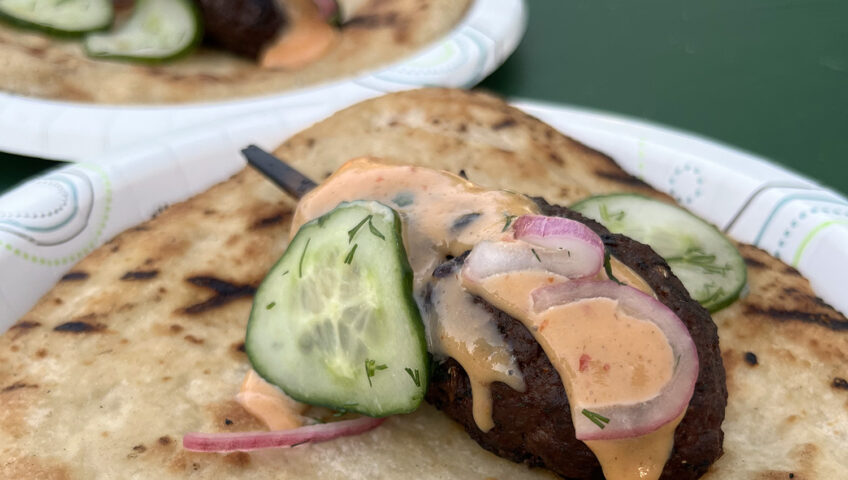
Roasted Pork Belly
Ingredients:
- Whole Pork Belly (Approx. 8-10lbs) Costco usually has whole pork belly but you can also find them in smaller portions at Kroger.
- JJ’s Original & JJ’s Smoked Chipotle Seasoning (Use your favorite pork seasoning)
Directions:
- Score fat cap.
- Gently caress your belly with oil.
- Season liberally with seasoning on all sides making sure to evenly coat your meat.
- Set Big Green Egg with ConvEGGtor or smoker to 250 degrees, once heated, place pork belly on the grid.
- Cook until an internal temperature of 195-200.
- Let rest, slice in ¼” slices and enjoy. You can also let cool in fridge, slice and place in pan/griddle to crisp up similar to bacon.
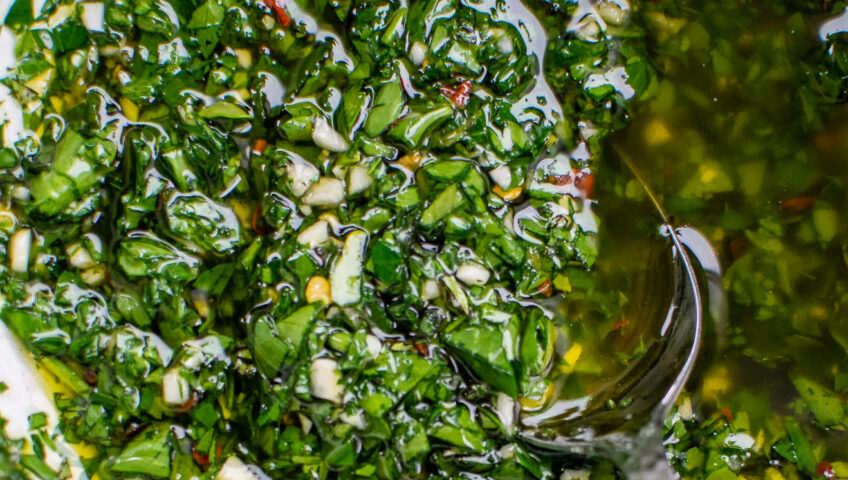
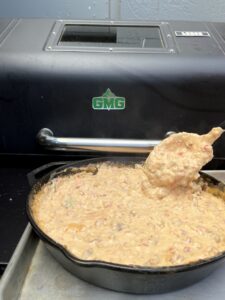
Chimichurri Pork Sauce
Ingredients:
- 3 cloves Finely Minced Garlic
- ¼ cup Olive Oil
- 2 tablespoons Apple Cider Vinegar (You can use balsamic or red wine vinegar)
- 1 teaspoon Lime Juice
- 1 tablespoon minced chives
- 1 tablespoon cilantro
- 1 tablespoon mint
- 1 tablespoon parsley
- 1 teaspoon mango nectar
- 1 tablespoon sweet red peppers or red onions or both!
- 1 tablespoon diced pineapple
- Salt & Pepper to taste
- (This is a very forgiving recipe, feel free to leave something out if you don’t like it or add extra of something if you like it more.)
Directions:
- Mix all of the ingredients and let sit for at least 30 minutes.
Grilled Corn on the Cob
Ingredients:
- Some good ole Ohio Corn in husks (We got ours from The Hoover Farm, which is located at the corner of Vans Valley & Miller Paul roads in Galena. They sell by the honor system. Corn is sitting at the end of the driveway)
Directions:
- Grill on low, roughly 350 degrees, in husks for approximately 14 minutes, turning 1-3 times.
- Remove from husk, add butter and seasoning if you want and enjoy!
- If having a party and you want to butter each corn easily, check out this hack that we used – https://healthstartsinthekitchen.com/butter-corn-cob-party/
3 Ingredient Peanut Butter Cookies
Ingredients:
- 1 cup creamy peanut butter
- ¾ cup granulated sugar
- 1 large egg
- Optional: Sea Salt & Dash of Vanilla
Directions:
- Preheat oven or Big Green Egg with convEGGtor to 350°F. Line a baking sheet pan with parchment paper or butter.
- Using a spatula, mix the peanut butter, sugar, and egg together in a bowl until smooth and creamy. Here you can add a dash of vanilla if you’d like.
- Using a 1.5 tablespoon-size spring-loaded cookie scoop, scoop cookies on the baking sheet pan about 2 inches apart. Flatten each into a smooth round shape and then use the back of a fork, making a criss-cross pattern. You can add a pinch of sea salt on each cookie here if you’d like.
- Bake for 10-12 minutes, or until the cookies are golden brown.
- Let sit for about 2 to 3 minutes on the pan, then transfer to a cooling rack until completely cool.
Comments/Questions
We’d love to hear from you! Give us a comment on what you thought or if you have any questions. Check our grilling class calendar to join us at our next one!